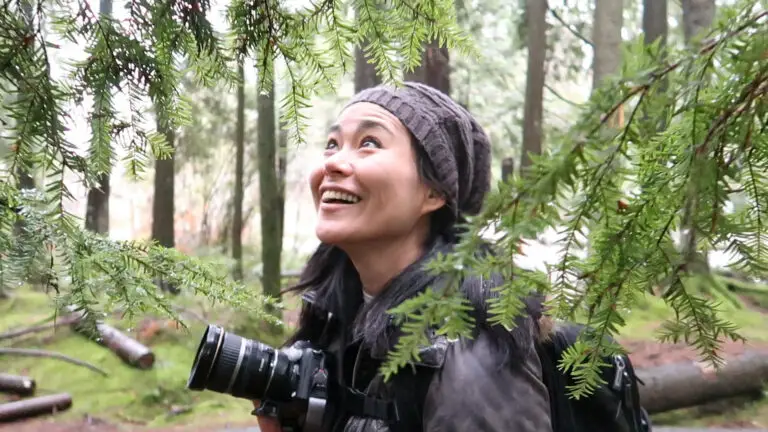
To grow and rank in searches, you need a good strategy. Don’t waste time troubleshooting. Let me help!
… Feeling stuck with your YouTube channel and don’t know how to move forward?
Wish you had one-stop resource and customized help to set your YouTube business for success?
I spent years making mistakes so that you don’t have to.
I’ve tried most of the things you’re thinking, only to fall into rabbit holes of wasted time, money, energy, only to end in disappointment and stagnant frustration. Ultimately, I discovered the essential things which build a sustainable brand, grow your income and sculpt influence to attract sponsors and brands.
My goal is to get your YouTube channel influential growth and monetization early on with the right mindset strategies and framework.
Master your Jump to YouTube NOW!
The Benefits you gain
Custom Tailored Solutions
Tailored to your brand and channel goals, we help you create a strategy for success!
Long Range Effects
The issues we resolve during the session will be insight which changes your result and practice.
Endless Benefits
By improving your channel health, you will jumpstart your growth, SEO understanding and understand various ways you can strengthen your success for the future.
Hi, I’m Christine!
I’m a video storyteller, a female solo travel influencer and video marketing &Youtube coach.
Seven years ago, I was a female solo traveler with a solid career living in New York city, filming and producing popular reality and online shows. The economy fell and long story short, I moved home to Hawaii and re-scripted my life! I grew my influence in the travel blogging industry and created a YouTube channel to empower solo travelers around the world to confidently take their first leap into traveling alone. And I’ve gotten a lot of emails over the years from both, women and men about how my videos helped launch and plan their first solo trip.
Today, I’m coaching creators & businesses to grow influence and monetize with strategy mindset and powerful personal branding on YouTube.
Video is my immersed passion – I’ve worked in most formats from corporate and news to lifestyle television shows, red carpet and live events. I’m also a SAG-AFTRA actress.
But YouTube and growing an travel influencer business took a lot of years of trial and error! When I began, all I knew is that I wanted to travel and film myself as an encouraging voice for nervous solo travelers like me.
Well, I’ve had coaches all my life– for athletics training, dance, meditation, acting… If you want to excel in anything, you need someone more experienced to guide you. However, I didn’t have one for solo travel or for YouTube! eep!
You can struggle with guesswork for years, slug it out trying to figure out how your competitors are succeeding where you’re not, Google answers and watch YouTube tip videos till you’re overwhelmed and uncertain what will work …and basically, never recognize or own your true potential.
I’m going to give you the jumpstart and guide you past all the head-scratching… to grow and monetize on YouTube strategically.
Let’s jumpstart your YouTube channel game…NOW.
Here’s some options for mentorship with me
Find your right fit match
YouTube Accelerator VIP package
A white gloves, high touch assessment of your current brand and channel strategy, so you can create videos that attract, grow and convert your right fit audience. You get an assessment report where we identify areas of improvement,ranging from channel navigation, potential branding design flaws, YouTube SEO practices and content strategy. We meet for four intensive deep dives and you walk away with a done-for-you strategy. Ideal for you if: You’ve been a creator on YouTube for a while, but you’re at a level where you just feel stuck. You’re ready to take your brand seriously, you tried all you can think of and you want to generate real business growth for the future.
My YouTube coaching program is designed for video creators and business owners who are striving to expand their influence and profit. We’ll come up with a customized strategy plan for your channel to level up your game so you know what 100K+ channels know and start you on a powerful business mindset.
Learn to attract your target audience, grow and monetize your brand through the power of YouTube marketing.
Video Jumpstart Academy
YouTube Influencer e-course
My online program teaches you my Video Jumpstart method on how to accelerate your growth on YouTube, build a business mindset and monetize from day one!
I dish insider strategies on building a powerful personal brand, a confident on-camera personality you’ll be a rockstar in, mistakes to avoid (from experience!), framework to generate content your audiences love, while making you income as you sleep. Turbo boost your channel by learning how to get discovered. If you are a business looking to attract customers or a creator/influencer looking for a profitable side hustle, this course is for you. Included: Worksheets, fast action workflow checklists, mindset lessons and insights into my strategies for success.
Fast action bonus: pitch templates make workflow and brand negotiations a breeze and so much more, more, more.
Travel restrictions have dropped on flying and masks are beginning to drop on planes. But what if you’re one of those travelers who is immune compromised or you’re still uncomfortable with being in cramped spaces with unmasked strangers? ? I get you. I’m going to share 3 top portable air purifiers for travel.
Whether you’re traveling by plane, train or bus, the idea of being strapped next to an unmasked (and sometimes, coughing) stranger, can be nerve-wracking for health-concerned travelers (like me)! The last time I flew, I sat next to an unmasked stranger on the plane, and if it weren’t for the portable air purifier for travel strapped around my neck, I’m sure I would’ve spiralled into paranooooia. I still don’t fully feel comfortable trusting my air space to strangers.
Also some jobs still COVID test you to make sure you’re clear for the work environment. The television production industry is one of them. I have to take COVID tests before I work on set and you can lose work if your test comes back positive. My sister bought me one because I was occasionally coming within close quarters of others when I worked on a television show. I wore it around my neck every day and when travel began opening, I continued wearing them.
What are portable air purifiers?
Portable air purifiers are compact, rechargeable wearables that you can wear around your neck. They are great for airplanes, trains, buses and automobiles. They are negative ion generators that can filter dust, allergens, viruses and sometimes odors! Portable air purifiers are not just for COVID but for many situations in which you may want fresh breathing air.
Wearing my FreshAir Personal My covid kit for travel: My portable air purifier, sanitization wipes and KN94 masks
How do air purifiers work?
Portable air purifiers operate by converting electricity into millions of negative ions that push harmful airborne pollutants away from your breathing zone. Ionization works by charging suspended molecules so that they attract other molecules. As more molecules clump together, they become heavier than the air around them, and can no longer stay afloat.
Negative ions are found in areas like waterfalls and green environments and remove bacteria from air. Thus, they theoretically create a perimeter of cleaner air and reduce the probability you’ll inhale contaminants.
Cons of using Portable air purifiers
No portable air purifiers can claim to kill COVID. At most, they can claim to keep your breathing space purified by emitting negative ions that push viruses away and some can be pricy.
Another thing is that these portable air purifiers operate silently. Some of them do not show much indication other than an ON light. You pretty much need to go off reviews and consumer research.
I still wear my portable air purifier when I travel by plane for hours as flying from Hawaii, my flights can be quite long.
There are many portable air purifiers out there. So which are the best? I collected this list based on what I use, according to high ratings, user reviews and how many negative ions the device emits. This is is my top three.
1. Vollara FreshAir Personal
The Vollara FreshAir Personal is what I personally wear on airplanes and in small, closed environments which lack of airflow. I’ve been using it since 2021. The Vollara FreshAir Personal uses electrodes to ionize the air and the battery life is pretty good. The specs claim it lasts 72 hours without charge and so far, I’ve run it for six to seven hours straight on a plane. It comes with a USB charger cable and a lanyard so I can wear it around my neck. It also has a metal standalone kickstand in the back so you don’t have to always wear it on you.
Cons: It’s not cheap and I don’t like that there is no light up information to let me know when something is happening. The photos of it are slightly misleading because the blue words on the screen leads you to believe there’s an indicator. That is not an indicator of anything- not even to tell you how much battery you’ve got left. That’s just decoration. The only way I know it’s working is from the tiny green ON button on the side. For the price tag, I would’ve hoped there’d be more to it, but this is it. But when I hold it close to my face, I can feel a subtle fresh air coming from it.
Dimensions: 2.2” W x 3.8” H x 1” D (55.6 mm x 83.8 mm x 25.4 mm)
The AirTamer A310 is the most expensive of all portable air purifiers and it comes from China. But the AirTamer A310 comes with backed claims from laboratory test centers who tested it on viruses and pollutants. It claims to produce a sufficient and effective amount of ions – three feet of personal space- and clears the area around the device, of smoke, dust, pollens, dander, fumes etc ...
Although AirTamer A310 does not specify how many negative ions it disperses, apparently, it’s been proven to remove pet odors too.
It was tested by Kitasato Research Center for Environmental Science and proven to “reduce influenza A and Escherichia Coli Phage MS2 NBRC 102619 by 99% within 20 minutes. and CARB approved with a zero ozone emission rating”. So that kinda means something, if you can comprehend it.
I personally just like that it’s small, cute and comes with a storage box, charging port and cable! I also love that it comes with a diagram that shows how it works. Con: At $150 … dang.
The Personal Air Purifier by IGOKOTI is on my list best personal air purifiers due to the fact its a good personal air purifier that’s a fraction of the cost of the others mentioned! It also emits the most negative ions.
I thought it might not be as good, but one customer filmed himself testing it trapping it under a glass with vapor and in 15 seconds the smoke was gone; thus claiming that the IGOKOTI filters second hand smoke. It also removes pollen and pet odors.
I like its all-black slick look. It reminds me of my old clam-shell phone. Of all the air purifiers, this offers the best value.
As a solo female traveler seeking unique and delectable experiences, venturing into the vibrant world of Puerto Rican street food is an absolute must. Pinones, a picturesque coastal community just east of San Juan, beckons with its rich culture, beautiful beaches, and a culinary scene that will tantalize your taste buds. Join me on a Puerto Rican food tour through this flavorful destination and discover the must-try Puerto Rican foods in this Pinones food tour. It’s an unforgettable experience for the taste buds!
Watch my Puerto Rican Food Tour w/ a Local | Pinones, Puerto Rico
Unraveling Pinones: A Local Gem
Pinones (pronounced: pin-yo-nayz) is not just a Puerto Rican neighborhood; it’s an experience that encapsulates the heart and soul of Puerto Rican culture. Nestled along the coastal town of Loiza, the charming community of Pinones is renowned for its glowing beaches and bustling food shacks known as “chinchorros.” These humble food vendors serve up a tantalizing array of deep-fried delights that are beloved by locals and visitors alike. But what exactly are “chinchorros”?
My Facebook follower and Puerto Rican native, Nivia, drove me out to Pinones to give me a Pinones food tour sharing the foods that have won the hearts of locals!
Pinones: Chinchorros and the Art of Deep Frying
Chinchorros are casual, open-air food shacks that have become an integral part of Puerto Rican culture. They offer a diverse array of authentic street food, each dish brimming with flavor and tradition. Visiting these chinchorros is a cherished pastime for locals, and the experience is incomplete without indulging in the art of deep-frying. Foods here are mostly finger foods made from seafood deep fried in lard. Food is super oily, inexpensive and tasty and alcoholic beverages are sold, so locals can kick back and relax.
The lively food shacks are easy to spot along the main road on Route 187. However, they can also be spread out further down the beach. The main chinchorro spot is near the entrance of Pinones, where you’d find several larger chinchorros sandwiched amongst restaurants with lively music blaaaaring. But there are quieter spots in rugged parking lots across the beach. Note: some of the quieter spots can have blaring music too because Puerto Rican culture is quite lively with music and dance.
Must-Try Puerto Rican Foods in Pinones
1. Alcappurrias
I tried alcapurrias first! Alcappurrias are savory fritters are made from a blend of yucca and green banana, stuffed with either meat or seafood. Then they are deep-fried to crispy perfection. They can taste super subtle– at first you might just taste the crispy batter, but when you take a chomp in the middle, you’ll taste the flavor of what is within. My vendor fried it crisp, so I tasted “burnt” until I got to the meatier part. Try it with crab meat if you get the chance! The crab meat in Puerto Rico tastes and looks different. The meat is on the darker or brownish side and the flavor of crab is unique and more earthy and saltier than sweet. Prices range from $2 to $4, making them an affordable delight.
alcapurria puerto rican food tour
2. Bacalaitos
Bacalaitos was my favorite! They are super crispy codfish fritters are a beloved Puerto Rican street food staple. They are made thin like a circular wafer and you’ll fall in love with that crunch, biting into the crispy exterior to taste the tender fish within. These are surprisingly oily, so you’ll need to carry it by napkin. They are around $3 to $5 per serving.
bacalaitos puerto rican food tour
3. Empanadilla
A cousin of the empanada, this deep-fried turnover is filled with a variety of savory fillings, from seasoned ground meat to cheese and vegetables. Prices vary from $2 to $4.
4. Pina Colada
While not a deep-fried treat, no visit to Pinones is complete without sipping on a refreshing pina colada, a delightful cocktail made with pineapple, coconut cream, and rum.
pina colada puerto rican food tour.JPG
5. Ceviche
Around three deep fried frituras were filling– it’s the lard! and you’ll feel the oil inflating in you. Ceviche with lime was perfect for cutting the oil and bringing my stomach back to balance . Ceviche is marinated seafood with a zesty citrus kick, available at the nearby restaurants.
6. Dulce con Chocolat
Dulce con Chocolat is a popular sweet treat available in various places across Puerto Rico, particularly at food stalls, street markets, and festivals. However, you’ll often find it most near the “chinchorros” or food shacks where other Puerto Rican street foods are sold. When you’re exploring Pinones, keep an eye out for these humble food vendors. Nivia found a Dulce con Chocolat vendor on a Pinones neighborhood roadside.
This dessert is made of fried dough that is fried with a blend of high-quality cocoa powder, milk, sugar, and butter into a deep golden-chocolate brown. It sorta tastes like fruit bread that you’d have at Christmas. A yummy treat. Prices typically range from $2 to $4.
7. Mofongo
This iconic dish is crafted from green plantains, which are fried to a golden crispness, then mashed together with a combination of garlic, olive oil, and sometimes pork cracklings, creating a harmonious blend of textures and flavors. Mofongo is more than just a dish; it’s a representation of Puerto Rico’s history and fusion of influences. The use of green plantains pays homage to the island’s African heritage, while the addition of garlic and olive oil showcases the Spanish influence that has shaped the island’s flavors over centuries.
mofongo puerto rican food tour.JPG
Pinones & San Juan Food tours to check out
Pinones Beach Food Tour: Immerse yourself in the flavors of Pinones with a guided food tour along the beach, where you’ll sample a variety of local street foods and learn about their cultural significance. Book Here
Old San Juan Food Tour: Embark on a culinary adventure through the charming streets of Old San Juan, discovering hidden eateries and trying traditional Puerto Rican dishes along the way. Book Here
Getting to Pinones
For solo travelers seeking to explore Pinones, you can get there by buses that connect San Juan to Pinones. Take Bus T5 (AMA): From the San Juan area to the Loiza area, you can catch the T5 bus. Loiza is the town where Pinones is located. The T5 bus route goes along the PR-187 highway, which passes through areas like Isla Verde and Carolina before reaching Loiza. But plan a backup rideshare app as well.
The lively food shacks are easy to spot along the main road on Route 187. The main chinchorro spot is near the entrance of Pinones, where you’d find several larger chinchorros sandwiched amongst restaurants. But there are quieter spots in rugged parking lots across the beach.
What would you add to this must try Puerto Rican foods list and would you add this Pinones food tour to your next trip?
Puerto Rico Travel Playlist
Whether you’re a seasoned traveler or new to the game, flying and passing through airports may not be your cup of tea, like it is for me! Living in Hawaii, a majority of my trips are long-haul flights.
What’s a standard long haul flight for me? Three connections, four airports and an overnight flight (or two!). A loss of a day or two if i’m traveling somewhere. So I want to share my favorite in-flight essentials for long haul flight that will help you save time, money, and space while keeping you comfortable and stress-free on the plane. Sit back, relax, and enjoy these essential tips and hacks for your next journey!
This post contains affiliate links. I never leave home without travel insurance. Here’s an tirip insurance finder tool to find one that matches your budget. I use World Nomads as it covers adventures . I also get the plan that covers gear and travel theft.
Hidden money belts and pouches keeps your passport, cash, and important documents secure and discreetly concealed under your clothing. For years, i used a money belt -not to wear on me- but to stash in my carry-on backpack so I could keep all my valuables safe and organized in one place.
But one thing that I can’t do is keep my flight tickets un-crumpled and accessible. I mean, i’m shifting between camera, mobile phone, passport and tickets…something is bound to fall in the juggle and I won’t notice if it’s a ticket (which has made me think about e-tickets more…).
Sooo close and yet a little far...
Volunteer transporting rescued pups from Puerto Rico to JFK as a Flight Angels volunteer!
Recently, I added theHERO Neck Wallet with RFID blocking to have and wear strictly for airports, TSA and gate boarding, where I need my identification (usually passport) and boarding tickets. Pockets are a little slim, so the largest you’ll fit in it is your mobile phone. But I love the organization and all my TSA -boarding essentials (tickets, passport, phone and some money) are in one pouch around my neck. I love it. For now.
Tip: Look for RFID-blocking features in your money belts and pouches to protect your credit cards from electronic theft. I’ve never experienced electronic theft personally (knock on wood), so I cannot say if RFID really works or if it’s just some extra way of selling something. But in this day and age, it’s good to cover all basees. Some money belts even have additional features like slash-resistant fabric for added security.
hero travel passport pouch
2. Sleep Mask
I never considered a sleep mask essential until I tried a Manta Sleep Mask. These is no ordinary cheapie mask you get for free. It’s a mask specifically made to block out light anywhere. It fits snug and firm over your eyes (I wake up with it still on my face) and it hits pressure points around my eyes which gives me a deep relaxing sleep. I’m in love with these masks!
I am not someone who has problems sleeping anywhere but I started using them on flights and they are ahhhhh. I also like to think they keep my eyes moist during flights.
Tip: Try the Manta Cool Mask which adds cooling to your eyes and the Manta Steam Mask to give your weary eyes rest and warmth.
A travel must is a multiport plug. These days much of our devices can be charged from USB and USB-C ports, so I love taking this handy multi port plug with me. It’s especially handy when i’m at the airport waiting and want to charge many devices at once or when I get a plane with a multi-plug adapter below the seat. Very useful to pack as an in-flight essential.
Packing cubes typically help you organize the contents in your luggage. However, I like to add a small-medium sized packing cube to my in-flight packing list to help me compress flight survival and overnight essentials, like microfiber no odor undies, GRRRLTRAVELER muscle t-shirt, lightweight jacket, scarf, leggings, etc… These are wonderful for compressing, containing and organizing extra articles of clothing down for me so I’m not carrying bulk.
Bagail Compression Packing Cubes are a game-changing technology of being a compression packing cube that further compresses your packing, thus, reducing the size your clothes take in your luggage.
Amazon Basics 4 pc set. This is an inexpensive and basic four piece packing cube set. Perfect for beginners.
If you ever felt those large packing cubes just got in the way your using your space efficiently, then Compass Rose Travel Packing Cubes are up your alley. My friend Alex at Travel Fashion Girl has small rectangular packing cubes that are sized to be stackable for carryon luggage.
I’m a big fan of using mesh pouches for travel and especially for in-flight essential organization. Originally, I buy the ones from Daiso, where there is a main and side pocket for organization. But the below photo is very similar. I like mesh because in a dark plane or when your in-flight tote is below a seat and you have to fish for items, it’s easy to feel and see your items. Mesh is also very flexible and can warp into many sizes and shapes.
mesh pouches for travel
6. Charging cables
I always like to carry a few of my essential cables with me such as my iPhone charging cable , my USB-C cable and vlog camera cable. More planes are beginning to come with USB outlets for charging your mobile device at the very least. But this also means I can charge camera batteries if I ever needed.
7. Cosmetic /Toiletry kit (okay, this is a little more than one item)
In my in-flight toiletry kit essentials i’ll carry minimal makeup, such as my BB cream and moisturizer (both, stored in coin-sized creme jars ), eyeliner, mascara, compact foldable travel hair detangler with mirror, tooth brush and toothpaste, panty liner, hair ties and my favorite DoTerra scented oil pen. I fancy natural oils, and this pen is good for a pick-me-up or when you’re sitting next to someone who doesn’t smell so great (like me and if i’m carrying any pitty or weird odors…which I try to prevent!).
8. Expandable Foldup Travel Tote (Personal Item)
Having a expandable foldup travel tote as a personal item is super handy, when you need the option to reduce your personal item or expand it into a travel tote that can transport your duty free products on your layover ! This bag folds up compact and can be zipped up with its’ own zipper.
The dimensions (below) are : 16.5 x 8.7 x 10.6 in size but the bag unzips and expands vertically to 14.6 inches height.I like that I can expand the bottom and I’ve found that useful returning home with souvenirs! There’s also a side that slips over your rolling luggage handle to keep it in place. The thing I don’t like is that the straps slip off my shoulders (however, I’ve had that problem with every tote and bra strap; I have sloping shoulders). The fabric is a bit more on a slippery side because its made of a water resistant material outside and inside, it’s coated with a bit of plastic so that spilled water cannot seep in or out. It’s stylish, but generic (and yes, if you look hard, it kinda looks cheap) but it’s functional, durable and best of all… inexpensive!
expandable fold up travel tote
The BagSmart Women’s tote is a chic option as far as travel totes go, with various compartments inside and out to organize anything from your reusable water bottle to iphone and tablet. The inside has a partition that separates either clothes items or your laptop from other items. It even has a flap to hold your yoga mat.
This tote is a ideal as a vacation bag when you want to feel girly or if you are a mom with toddlers or a newborn– it’s cute but functional with all various organizer pockets. As a carry-on purse for in-flight travel, you can separate your jacket and snacks from your laptop and then store it under your seat. The material of the bag feels nice and luxurious. It is a high-quality and well-designed bag that is ripe for jet setting or being a travel girl boss on her way to speak at a travel conference.
The bag lays flat if you want to pack it in your luggage. I got one from attending Women’s Travel in Summit for Creators as a speaker and it’s beautifully chic. Take it on your business trips or weekend trip to Cabo with the girls.
9. External Battery Charger
Travel enthusiasts are aware of the value of carrying a portable charger. One of the worst feelings is when your phone dies on you, but a Popsocket x MagGo portable external charger by Anker(see my review & video) will cordlessly charge you a couple times over. The beauty and convenience of the design is that it’s magnetic and will stick to your magnetic charging mobile case and charge it while you’re using it. Note: It has been known to heat up my iphone, especially in hot climates. But I still love it and won’t change.
If you need a charger that can charge multiple items, check out Anker 10,000mAh portable charger. It’s a teenie heavier than the others and more the weight of a mobile phone. But it has two USB charging ports!
Alternate option: Lipstick-Sized Portable Charger like MyCharge Hub Mini Portable Charger 3000mAh is perfectly compact to take on the go and it has its own charging cables! Its a compact portable charger, so it is space-efficient. Your device will swiftly be charged, and there will be extra room in your bag for more things.
ANKER popsockets maggo battery
10. Baby wipes
Sitting in recycled air for hours can make you feel stale, and sometimes, you just want to feel fresh. One must pack item for In-flight essentials on long haul flights is biodegradable baby wipes . When you don’t have a shower, this comes in handy.
Tip: For ladies, this is ideal when you have your menstrual period and want to feel fresh in the nether regions!
biodegradable baby wipes
11. Portable Air Purifier (included in my My Covid Kit)
portable air purifier is part of my covid kit for travel
12. Merino Wool Shirt
I’ve started packing my Unbound Merino shirt (photo above and read my review – I love and highly recommend their travel dress too!) I love packing it as a backup essential if I want to change into something more comfy, but also classy, moisture wicking, and the caveat is that it does not take on body odor.
For some reason when I travel, my shirts can occasionally take on a very (arm) pitty odor – probably because my arms are pressed to my sides in the seats. With my merino shirt, I don’t have to worry about that problem. Additionally the wool fabric is temperature controlling so i’m neither too hot or too cold while wearing the shirt. I’ve used it in the most humid weather (including Nepal’s monsoon season ) and they stand up to the job without me breaking into a sweat while wearing it!
Tip: This one classic t-shirt/blouse substitutes for a few as it lasts longer and doesn’t need regular washes like everything else.
13. Flip Flops
Flip flops are a handy essential footwear to bring for on your trip, but it can also be freeing for your toes when you fly! Please, do not walk on the plane floor or into the lavatories with your bare feet! (woof!) I pack my comfy soft GRRRLTRAVELER flip flops or my super slim Havaianas.
ocean black flip flops
14. Pashmina Scarf
Pashmina scarves are wonderful to add to your in-flight packing list because it’s a multipurpose accessory and is longer than most fashion scarves. It has more purposes than fashion but can act as scarf to keep your neck, chest and head warm on the flight. You can turn it into a shawl and ultimately, into a blanket if you’re on a long-haul flight that does not offer free blankets.
I’ve traveled with the same green pashmina on every trip for over two decades! I’ve bought other scarves since then, but this is the one I always travel with! If it ain’t broke, don’t fix it.
A scarf has multiple uses which help you battle the elements. They can also be used for temples!
15. Travel Insurance
These days, travel insurance is just a given necessity. They cover stolen and lost luggage, or if your flights are canceled, but they will even pay your medical bills if you end up needing to see a doctor while you are on vacation. I never travel without it, so don’t take any chances by forgoing travel insurance.
When it comes to basic travel insurance to cover my domestic trips, I go with the free trip insurance I get from my travel credit cards. However, when I travel internationally, World Nomads is my favorite option for adventures. It covers theft and adventures that most travel insurance companies do not cover. Often, I’ll stack this on my basic insurance, just for the theft and adventure insurance.
Another good site to check out isTravel Insurance Master. They have a trip finder tool that helps you find a plan to match your needs and budget.
16. Lightweight, packable jacket
Definitely pack a light weight jacket with you. I have three types of jackets and they vary accordign to layover time. ‘
One that’s more for brisk jogging and is stretchable and form-fitting. It can be layered under my lightweight jacket.
Portable, packable jacket (it’s Uniqlo, but similar to this ). It comes with a pouch. It’s a very thin windbreaker that traps in the heat against my body. Says it’s waterproof but they never are and if it rains you’ll still feel soaked. But it’s good as an extra layer of warmth.
17. Compression socks
A lot of travelers list flight compression socks to keep circulation in your calves and feet. I’ve only worn compression socks on one flight and didn’t like that it felt like I was cutting off circulation. But it could be that I have large Asian calves or I don’t know how to find my right size. I use it more for freelance camera operating when i’m on my feet for the entire day. I’ll list it here because it’s smart and some travelers will need it. As I get older it certainly becomes more of a consideration for me, especially as I have bad circulation.
18. Snacks
What to pack for long haul flights? Unless you like ordering from an overpriced plane menu, I always pack snacks. I’ll pack my main meal and some power bars and Japanese cracker snacks. Japanese rice crackers are light, neutral food and not packed in fatty grease. They satiate a momentary hunger and are perfect to eat while you’re watching your in-flight entertainment.
Japanese rice cracker snacks for travel
19. Reusable water bottle
Bring areusable water bottle or buy water that comes in reusable, recyclable containers.
In the past, my travel hack was to buy one plastic liter water bottle before my trip and reuse and refill it all the way through. I didn’t want to carry a hydroflask, which added to one more item to be responsible for not losing and I wasn’t crazy about adding ounces to my already heavy camera backpack. It meant I could lose or forget it and not feel like I was out-of-pocket for the loss. Well, i’ve found a better water bottle hack…
These days, I’ve been buying water brands that are packed in reusable flasks, such as Pathwater. The water is 9.5 PH balanced water with electrolytes, but more importantly to me as a responsible traveler, it comes in a light-weight, wide-mouth design for easy refilling, and easy to care for. Just hand-wash or shake with a few drops of dish soap and warm water, then rinse.
Sitting in one position for hours can make you feel stale and you can start smelling it too. For times when my body odor acts up I like to pack chlorophyll capsules for the flight. They’re like body mints that act as an internal deodorant. It really works and I love it!
Tip: Did you know Chlorophyll tablets reduce altitude sickness too? This comes in handy if you’re trekking, if you’re traveling to high altitude destinations or if you’re traveling with me to North Pakistan with me this fall!
natures way chlorophyll
21. Keychain Pen
Always carry a pen in your in-flight tote, because it will come in handy when you have to fill out your arrival or customs card. The last thing you want to have to do is dig in your carryon luggage in the overhead compartment for a pen or feel awkward asking your next door neighbor. I’ve been using the Side by Side keychain pens because they’re the perfect mini size for me to clip to my neck wallet or tuck into my cable pouch.
22. Extra undies
I always pack extra microfiber no odor undies because you never know when a flight could get cancelled and you have to spend an extra night somewhere, or if you get period leakage. Usually, I travel with my carryon so I always have clothes available to me.
Underwear is a personal choice, but sharing is caring, so i’ll spill. I’m a no-nonsense, practical, athletic and survival-based female solo traveler, who wants sturdy basics with a twist of cool style. I sweat a lot and with long hauls, the crotch is sandwiched in for a long time, so I like Hanes microfiber seamless bikini panties. Hanes is inexpensive, smart and good value. They’re a household name. I go between their microfiber and cotton bikinis for comfort, design and durability..
Anti-theft travel purses can have secret pockets, slash proof straps, RFID pockets and more! Before taking any ole purse consider one that you can travel with piece of mind safety. I like the Baggallini Comrade 3-Zip Crossbody bag (for the minimalist traveler who likes organization), Ameribag Classic Healthy Backpack bag (if you want something that feels like it has never ending storage and organizer zipper pockets- I’ve had mine for decades and it is now retired to my camera crew jobs where I carry tools!) and Baggallini Horizon Crossbody (for practical purse style).
Thanks for reading! Be sure to check out my long haul flight review videos for a peek inside the airlines I’ve flown with, airplane foods and airports!
What do you pack for long haul flights? What would you recommend adding to this in-flight packing list?
solo traveler guide to top travel scams around the world
As thrilling as it is to explore new destinations independently, it’s crucial to be prepared for potential tourist scams that target unsuspecting travelers. In this blog post, I shed light on the travel scams to avoid if you travel solo and tips to help you navigate unfamiliar territories with confidence.
This post may contain affiliate links. I never leave home without travel insurance. Click for the tirip insurance finder tool to find one that matches your budget. I use World Nomads because it covers adventures that many other insurances don’t. I also get the plan that covers gear and travel theft.
Despite what some may think, that solo travelers make easy targets because they are alone, I disagree completely. Travelers in a group can make ideal targets for things like pickpocket and theft. But solo travelers only have themselves to look out for and make decisions. This weight of being responsible for your choices can make solo travelers feel hyperaware, anxious and vulnerable.
Travel Scams to AVOID if you are Travel Alone
Whether you’re planning a solo backpacking trip or a solo business venture, avoiding travel scams and knowing how to deal with or prevent them, safeguards your peace of mind so you can appreciate your independence more. Here’s some common tourist scams to beware of.
1. “Your hotel burned down…”
Your hotel burned down is an all too common redirection scam to deter you from your original hotel so the scam artist can take you to their hotel, where they’re likely receiving a kickback.
Always call your hotel in advance or on the spot to confirm all is good for your arrival. Many hotels and hotel booking services send you friendly email reminders about your stay, but all the same, this scam can work with naive travelers.
Book a hotel with airport pickup service so you don’t have to worry about getting to your hotel.
Buy a local SIM or put your mobile service on roaming so you have access to a phone and can make phone calls or mapquest your route.
Use ride share. Rideshares allow you to give drivers ratings and some allow you to leave reviews.
2. “That attraction is closed.”
“That attraction is closed.” is another redirection tactic scammers use to free your plans up so they can seduce you to their tour and souvenir or gem shops. I had this happen to me when I was visiting Bangkok’s Sometimes, they have agreements with the shop owners to bring you there in exchange for payment. I always check to see if the attraction is indeed closed.
3. A stranger leaves you a bracelet, pin, etc…
If a stranger places a pin, jewelry or friendship token before you and walks away, do not take it unless you want to make a donation. It’s not free. But if you want to support the community and it’s inexpensive, at least choose one that’s cute.
4. Taxis
I’ve had my run in with a Bangkok taxi scamming me or wanting to take me to commission shops. I’ve had Indian and Thai taxis try to drive without the meter, by telling me it was broken. I’ve even had an angry Indian taxi driver leave me in a dark street at 11pm because he was going in the opposite way of the railway station (according to Google Maps) and I had called him on it. He tried to intimidate me by yelling at me, but when I wasn’t scared, he told me to get out!
Ride share apps like Uber and Lyft are a more reliable and trustworthy option, although I’ve heard of stories with those too. But when it comes to cash-free transactions, the ability to track your driver in real time and rate your ride, the rideshare services are still better than taxis.
Ask a local what their most reliable form of transportation is. In Sri Lanka, there were many rideshare tuk tuk services. In Mexico, Didi Driver app was more reliable than Uber. In Nepal, they have Pathao and In-Drive where you can hire cars to motorbike transportation. My hotel concierge recommended In-Drive as his favorite due to the costs. But expats I talked to preferred Pathao as slightly more in costs, but safer and more reliable.
Note: There may be rules about ride share and where they can/cannot go. In cities, taxi drivers have a tension with ride share drivers, especially when it comes to airports. In Cancun, Ubers are allowed to enter the airports, but they’re not allowed to pick up passengers and if caught by taxi drivers, this could spell a fight.
Beware of private or luxury taxis. They’re not quite scams but some will try to lure you away from the normal ones and charge a higher price.New York and Seoul black sedan taxis are infamous for this. But the locals also know there’s a price difference between them. Only unsuspecting tourists don’t.
Never tell a taxi driver it is your first time in that city, even if it is. Never let them know if you are alone. It’s always good to take a photo of your taxi driver’s name/permit so you can report him if anything sketchy happens and it’s also handy, if you’re the forgetful type of traveler, who leaves your belongings in the car.
If the meter is broken, find another taxi. Period. Foreign travelers don’t know the going rate per distance. Taxis do and this is taking advantage of helpless tourists that don’t know better.
If a taxi driver offers to take you shopping when you want to go elsewhere, tell them you’re meeting a friend and cannot waste time. These days there are so many ride-share services that I’m surprised taxis still attempt occasional scams.
Scam artists sometimes pose as bogus police, offering to guide you to somewhere safe, but often they will lure you to a shop where they get commission kickbacks or god forbid– somewhere worse where you are robbed. I was lost in the streets of Marrakesh, when a friendly officer offered to guide me to where I was going. I saw his police uniform and immediately assumed I could trust him. But instead of helping me find my way out of the maze of streets and to the main bazaar, he led me deeper into the streets and ultimately into the basement of a leather shop during after hours. By then, I knew he wasn’t a police officer. He gave me a tour of their empty tannery (the workers had gone home) and said if I wanted to buy anything. A salesman came out and I started to feel outnumbered, pressured and unsafe. So I quickly told them I was late, had to go meet a friend and quickly scampered out. The bogus police let me leave and after that, I only approached Moroccan women to ask for directions.
Do carry a fake wallet.
Never tell strangers you are solo. Always let them know you are traveling with a friend/husband/wife, so they know someone will search for you if you go missing.
Avoid carrying all your money/valuables on you . Always leave the majority of your withdrawn cash in your hotel safe. I like also personally like to split my money into different stash pockets when I sightsee.
Counterfeit travel and tour agencies exist. In Ho Chi Minh and Hanoi, they are virtually everywhere and they sell their services in the name of reputable companies. I cannot tell you how many Vietnam Airlines shops I’ve seen! And while you may still get decent service should you go with a counterfeit tour company or business, it’s all still shady.
Write down your tour company’s address beforehand. When I was dropped off for my trekking tour with a reputable tour company, my driver didn’t know which address to take me to as there was a counterfeit shop down the street.
7. Fake takeout menus slipped under your hotel door.
I’ve not encountered this one, but only heard about it, where scammers leave fake food menus under your hotel door and when you call the number, place an order with your credit card, you won’t receive your food. Always check with the hotel reception desk before ordering or better yet, check your Google Maps for nearby food options.
8. Car Rental Damage
Always check your car rental before leaving the car rental parking lot, especially if you didn’t take the damage waiver. I rented a car in Los Angeles with Enterprise car rental (yes, Enterprise). It was not the airport branch but one of the local ones in Hollywood. They tried to encourage me to buy collision and damage insurance and when I declined, they warned me about fees I’d incur if I returned the car with any “golf-ball sized dings”. They even showed me an example which I thought was weird at the time. I declined it because I bought collision insurance through Expedia where I booked the car and I had paid for my booking with my American Express card. I was doubly insured. I used the car for one day and minimally at that. At night, I parked it in a quiet and nice neighborhood. The next day I returned it, they found guess what– a “golf ball sized ding” under the running board under my car door and on the roof! Oddly, no paint was scratched and the dings were in two spots you’d not think to look! I eventually fought this through my American Express insurance and won, but still, it had me upset for weeks and I pledged to never use Enterprise car rental again.
Ask the car rental agent to lead you around during your car check. Request the rental agent show you common places you need to watch out for. Check above and below the car. Beware of the “golf-ball-sized” warnings.
Take photos of questionable damage or scratch in advance.
Ask for proof the car the car did not enter the autobody shop within the last six months. Okay, so you are hit with a suspicious damage, and it’s in a location that you didn’t think to look at. Ask for the car’s repair records for the last six months to prove
Buy trip insurance. By now, getting basic trip insurance is a given. Travel rewards cards like my American Express card and Chase Sapphire card come with free and auto collision insurance for car rental situations built into it while also offering perks like free checked luggage and enough bonus mileage for your first free trip..
You can find trip insurance plans in your budget here.
9. Motorbike Rental Damage
You’re renting a motorbike in Thailand or Bali and they ask for your passport. Some travelers don’t want to give it as it is sensitive information and it is really not necessary. Some companies will use it as a security deposit as travelers DO get into motorbike accidents often. This is why trip insurance is handy and I always get it ( World Nomads is the best because they cover activities like this, where other insurances do not)
Do not give out itinerary information on where you’re staying. Some tourists have found their motorbike tires slashed overnight or their bikes stolen.
If this happens to you, get a police report. You cannot claim insurance without it. Also, take photos and do not trust the motorbike company’s repair quote if it feels excessive. Get it estimated or offer to get it repaired elsewhere.
10. Buying expensive jewelry or gems
Okay, I’m not a big jewelry or gem person, so I’ve only heard of this scam, which is being taken to a scam jewelry shop and being sold fake gems. Don’t trust a taxi driver or a random person off the street, who wants to take you jewelry shopping.
Do your research and only purchase gems from legitimate gem dealers.
11. Destitute Mother with Baby
You may have seen a mother with an infant in her arms begging (or for that matter, a homeless person cradling a dog– these really make me mad). In many cases, the infant does not always belong to the beggar (and the dog is stolen). Other examples are begging children, and cripped or blind beggars. This is a tactic to gain sympathy and although you have good intentions, the money does not often go to the beggar, but to whom they work for or to an addiction. After the movie Slum Dog Millionaire came out, it exposed how children are used by gangs to work as beggars.
One traveler said they bought milk for a begging mother with an infant at a nearby milk shop, only to witness the mother return the milk back to the shop, where they paid her. I’ve bought food for beggars only for them to not know what to do with it. The moral is, you don’t know if the panhandler is truly who they appear to be, …if they’re using your money in the way that is intimated… or if there is a larger scam at play.
If you want to make a donation, do so toTheRed Cross, Salvation Army or charitable non-profit that assists homeless families. Donate to the organizations you know are helping many recover from poverty.
Always keep your credit card in your eyeshot.Anyone can take it to the back and take a photo of it.
I once checked into a hotel and within a few days, my credit card company flagged a notice about a huge Best Buy purchase made in the city I was in. At the time, I traveled a lot for work at the time and always had to put a credit card down for my hotels, so I opened a separate credit card that I used strictly for staying at hotels and work incidentals.
Keep a separate account for travel and travel debit/credit cards. Some travelers like to travel with a prepaid credit card so if their card gets stolen, they only lose the money the put on it.
Place notifications on your credit card so you are notified each time the card is used for a purchase.
There are many types of pickpockets out there. The ones you hear most about are gypsies in Europe like Barcelona, Paris, Rome, Athens. Sometimes, they come in the form of an overly helpful local who helps you clean up mustard that’s spilled upon you. Many of them stand outside train and metro stations waiting for an unsuspecting traveler to help and sometimes they can work in teams to distract their targets as their accomplice does the stealing. I’ve had a gypsy who was an obvious gypsy wait at a train station in Bologna to help passengers buy their ticket in exchange for money. In my case,I actually needed help in buying my ticket so I let her show me how but kept my credit card far from her. All I had on me was a yogurt, so unfortunately that’s all I could pay her with.
Situational awareness. Be aware of your surroundings and hold your bags close to you. If you’re going into a crowded train or bus, swivel your bag in front of you and place your hand over it to show you’re prepared for pickpockets.
Carry anti-theft purses (here’s wonderful recommendations here and here)
Some locals may want to take you home with them or treat you to a drink. Ask yourself what you did to merit that hospitality. In Kyoto, I once met an unusual grandma on the bus who wanted to take me home to meet her nephew. In Japan you don’t think about scams because the country overall feels safe. But while I wasn’t looking that grandma was trying to look into my backpack and when I turned back she whipped her hand away.
As a solo traveler, I have a tendency to make fast friendships with locals and other travelers. I’ve gotten bold about inviting travelers to split the costs of a room with me or to share a taxi. But while I like to give strangers the benefit of the doubt, I never drop my guard. When meeting people, I always have my window rolled up high until they prove themselves and over time, I slowly roll that window down to half way.
This is more for the guys than the ladies, but I’ve heard stories from guy friends where they’ve been picked up by local ladies while sightseeing and the lady wants them to visit a bar with them to get to know each other better. When they are lured there, the female in question has them buy drinks, gets them drunk and then robs them.
I had a male friend that met a Chinese woman in Beijing at the Great Wall and she took him to a bar where she had him keep buying drinks for her. That’s too common scenario for bar escorts in Asia.
I’ve heard of more dicey scams, where the male is lured into meeting the woman’s male friends in a gambling room and the male traveler finds themselves pushed into playing cards, until the friendly game quickly turns into betting and they have difficulty escaping. Avoid the attractive flirts.
16. Taking photos of street performers
Think twice, before you snap at street performers! The moment you snap, be prepared to pay for that photo. I especially do not like street performers who use animals as entertainment because of the exploitation. When the animal does not perform they are punished. Your dollars are not going to their care. Read my post on responsible travel tips for ethical travelers
17. Being charged double gratuity
Always check restaurant bills carefully. Sometimes, they’ve already added a gratuity or even a double gratuity. It’s not really a scam but still, make sure you’re not tipping twice.
As an American, this sometimes accidentally forget this rule, that in some places, gratuity is already added. Traveling Memphis, they not only had a gratuity, but one place also charged me an extra dollar for a Ukraine relief fund. Mexico occasionally adds in a gratuity charge as well. Always, always check your bill when you get it.
18.The Sob story
Spare a quarter? I can’t afford the plane ticket, bus ticket… home. We’ve all heard this a couple of times, if not seen it written on cardboard signs at the on-ramp of a highway. Often that is a form of manipulative begging to get you to help by donating money. With beggars, they’re not going home but often using it for a drug problem. Panhandlers in the U.S. can make as much as a $100/day doing that and it does not motivate them into finding a job when that is their job.
19. Cashiers and money changers will count your money fast.
Always check your money when you receive it from a local money changer. Recount the money before you walk away and stand in front of the changer while you do this. Some money exchanger will try to switch money on you or return less the amount they’ve quoted. For this reason, I avoid money changers and prefer ATMs at reputable local banks during banking hours or I’ll go to the airport exchange when I arrive, even if I know i’m paying a little more in the exchange value.
Additionally, when you make purchases at stores, using large bills, always recount your money. I have a bad habit of not doing this and sometimes, cashiers can be flawed. You want to make sure you’re getting your correct amount back.
Break your large bills ASAP so you’re not breaking change often.
1. Research in a new city and possible scams before you travel
Research is the best way to prevent tourist scams because most scammers prey on naive tourists. I like to Google “common tourist scams + (insert name of city)” to see what article it pops up. In some destinations, like southeast Asia and Thailand, scams can feel like harmless bug bites. But in major cities like Rome, Barcelona, New York, they can feel much more intimidating.
There are some places that just breed scams with sketchy characters and red light behavior. In Bangkok, I went to a ping pong show with some folks I met at a hostel and the night quickly turned from silly to dark when the mamma of the house, blocked the exit until we purchased more drinks.
Going to a ping pong show is a regret of mine, not because of the scam but because of how degrading it is to women- AVOID THIS at all costs.
4. Practice street smarts
Street smarts is soethign I use on all my trips. It basically means that I don’t let my guard fall for anything, because I am the sole person responsible for my life. When traveling abroad solo, you are responsible for your life. Don’t entrust it to others. Check out my street smart safety tips
5. Trust your intuition and gut
If something doesn’t feel right, then it usually isn’t. Trust what your instincts are telling you. As solo travelers, our intuition is usually on high to protect us. Listen to it.
6. Buy Trip Insurance
While you cannot always prevent bad things from happening to you, you can be insured enough to be compensated for some of it. I use World Nomads because it covers a lot of the adventure activities I do that other trip insurances won’t like riding a motorbike, scuba diving, trekking, etc..
Have you been a target of a tourist scam? What would you recommend in travel scams to AVOID if you’re traveling alone?
World Nomadstrip insurance that covers my adventure style in travel.
10 tips for travel vloggers Photo Credit: Erik Mclean, Plexels
This post may contain affiliate links. I never leave home without travel insurance. Here’s an tirip insurance finder tool to find one that matches your budget. I use World Nomads as it covers adventures . I also get the plan that covers gear and travel theft.
Being a solo female travel vlogger on YouTube and freelance camera operator, I love shooting stories in exotic and new destinations both, at home and abroad. The one important rule to acknowledge with travel is that there is no do-over once you leave a destination. You need to get your shots and shot list checklist complete so you can tell the story. Thus, being thoughtfully prepared and packed for my shoot is most important to me. I’m sharing travel vlogging tips to prepare you for shooting a destination .
Travel Vlogging for Beginners: Is travel vlogging for women different from men?
Being a solo female travel vlogger brings unique challenges compared to male counterparts, even though our camera gear and YouTube styles may be similar. I strive to be authentic with my audience, but sometimes, I hesitate to share my struggles as a woman in a male-dominated industry, fearing I might be perceived as “whiny.” However, being a female vlogger on a solo travel journey presents distinct hurdles.
Safety is a top concern. Navigating unfamiliar territories while being a female traveler demands constant vigilance, especially in societies with traditional gender norms. Cultural differences and societal/dress codes can make it more challenging for me to blend in and stay safe. Additionally, carrying my gear around adds a physical and emotional burden, and dealing with touts and travel scams can feel overwhelming.
travel vlogging for beginners: how to start a travel vlog.
Each new destination requires me to adapt to a unique set of rules and customs while ensuring my storytelling remains informative for my travel audience. Speaking to my camera in public spaces can attract unwanted attention, leaving me feeling nervous and self-conscious.
Despite these challenges, I’m determined to overcome them and share my amazing experiences with the world. As a travel vlogger, I believe in inspiring other women to embark on their own solo adventures and break through the barriers. Here are some tips that have helped me along the way:
1. Never pack your main camera gear in your checked luggage
A rule of thumb is that you never want to separate yourself from your main camera gear because it is both, essential to your film trip and valuable. Your flight can get delayed or your luggage can get tossed, lost or stolen.
So what can you pack in checked luggage?
Cables, adapters and backup chargers (I always keep one for my main gear bag in case luggage gets lost and I have to charge things).
Pocket light panels, gorilla pod, tripods and selfie sticks.
If I pack valuable gear I’ll pack a short lens and wrap it up in my clothes or tuck it away in a shoe or cup.
Avoid packing camera and external batteries. You may carry a lot of batteries like me, but it’s against airlines regulations. I like to pack my accessories in my luggage (although I take mostly carry-on luggage so i’m never far from my gear period).
2. Decide on the right gear to pack and which to leave behind
When you travel and film, you need to choose the right gear to bring with you, because you’re carrying it for the entire day. It’s like a marriage that has to last for the day. Pack the wrong stuff – underestimate your shooting needs or the weather– and you’re kicking yourself for hours.
Think about the shots and content you want to capture first and then the weather. Then plan your packing around it.
I know photo journalists who carry two DSLRs, so they do not have to switch out lenses when they shoot for an event or red carpet. But solo travel run and gunning is a beast when you’re sightseeing, walking crowded markets and doing outdoor activities like hiking. It also takes mental preparation when your day spans into a long day of navigating public transportation, taking Uber or rickshaws and getting lost on foot!
Your camera backpack weight, the miles you’re walking, the obstacles of filming the shots you want and the climate… they all add to the challenge.
Leave some gear at your hotel or home. Although I pack gear for my trip, I also repack my gear for the day’s itinerary and shooting needs.
For travel portrait days (I don’t really do portraits), I might bring a 50mm lens.
Travel vlogging for beginners
3. A wide-angle lens is a must for making travel videos.
A wide-angle lens is a must of travel content creators; you’ll be glad when you make that investment. Other camera lenses will not be able to capture the landscape as you experience it and even your wide lens will not capture the epic greatness you experience.
I’m typically the type of film coach, who advises that it doesn’t matter what gear/brand you get, but this is one piece of glass you will find the most use with.
I recommend a 10-22 wide angle lens (I have this and I’m a Canon user! It’s the one in the photo below) for the budget videographer. It is a sweet piece of glass, the lightest of the wide angle bunch and the least expensive of wide-angle lenses, next to the ultra-wide 11-24mm lens.
The 11-24mm ultra wide angle lens offers stellar, high-quality performance and is great for architecture, landscape and weddings. The con is that it can be pricy and a bit more on the heavy side. It is a solidly built camera lens with heavy glass.
These two wide-angle lenses are the best bet to capture your landscape before the image begins to distort.
11-24mm canon ultra wide angle lens
4. Keep travel camera backpacks compact
When you solo travel, you carry your all your camera gear and luggage with you. You want to have a light and maneuverable equipment backpack, as you’ll be wearing the weight on your shoulders and back within the course of your travel-film days. Check out my camera backpack (I absolutely love it for solo filming)
Avoid large camera backpacks. I’ve had to fit my camera gear on anything from train lockers, plane cabins to maneuvering small and crowded buses in developing countries. Large backpacks also tempt you to want to pack more than you need.
Adaptability. You want to comfortably transport your valuable gear on flights (laptop included, if you take one). But you also want to be able to downsize and strip down to the travel-film essential you need, during long haul sightseeing days when you spend a lot of time on your feet.
Being light and nimble helps you move quickly and fit into tight spaces.
If your goal is to grow a successful YouTube channel, then plan your trips around your film shoot ideas. Each day is an expense, when I’m traveling a destination and even my sponsored stays come with a time limit.
I am IN for the shoot; OUT when I’ve collected the stories/videos I came for. It’s what is in my film budget. There are times that I certainly want to stay longer, but my time is often shared with freelance videography work at home that offers paying clients vs the passive income that blogging/vlogging brings and must be earned by investing time, energy and money into content. Generally, it’s hard to take a vacation when your job is to film your “vacation”. I can only truly turn off my camera when I’ve reached home.
Being a solo female travel vlogger involves juggling two distinct aspects: the basic travel budget and logistics, and the filmmaking and content planning. It’s a challenging, rigorous but rewarding journey that requires preparation and adaptability.
On the solo travel front, I meticulously research and plan my trip, trip dates, prices, considering factors like budget-friendly accommodations, transportation options, and personal safety as a female traveler. Dealing with language barriers, managing equipment gear, and navigating unfamiliar situations … it all happens here. I need to know where I’m going, who I’m meeting and by what mode of transportation I’m using (i.e. bus, overnight train, ride share, rickshaw, etc..). I have to be prepared for every situational variable that’s thrown at me and if I’ve never experienced it, then whoa, there’s always a first time! How to use a bathroom that’s got a squat toilet, in a stall with no luggage hook and with all your gear on you and luggage with you… that’s a learned female solo travel vlogger skill!
As a travel vlogger, I dedicate time to plan my film shoots and create content. Researching filming locations, potential story angles, and researching and connecting to sponsors is crucial. Reaching out to sponsors takes much behind-the-scenes work, but it can help travel-to-film expenses be more manageable, unless my YouTube income covers that additional expense or I can upsell a stay into a paid freelance project! (And when I get home to edit all this footage and post social media posts, budget has to be factored in as well!)
Taxes: I consider expenses associated with video creation, like flights, transportation, meals, activities, guides/fixers, Uber, food haul expenses and visa fees, which can be claimed as Costs of Goods Soldwhen I earn YouTube income.
Being responsible for my content, including correctly pronouncing foreign words, is essential, even though mistakes can happen and jerks leave you a stinky comment about how I should know how to speak their language.
Balancing both aspects during a trip can be taxing, especially when facing physical fatigue and challenging weather conditions. Something as small as your ponytail getting caught under your camera backpack strap can be the last straw! Despite the difficulties, proper planning and finding support make traveling and filming more manageable and enjoyable.
6. Choose the right travel camera bag for solo travel
One of the most vital things about choosing the right travel camera backpack is functionality. It needs to be easy to access so you can remove your camera and start shooting immediately. You want your gear to be organized, easily accessible for breaking action. You also need to be protective of your gear and protected from pickpockets… Yes, it can be stressful if you’re a woman traveling alone carrying visibly expensive gear that needs to come out for you to do your job.
You want to think of your backpack in terms of how you’ll maneuver a crowded train in Japan, dirty back alley streets of Varanasi or on a city walking tour, where you’re in a group that has to keep moving.
Photographer’s bag cases that you have to lay on the ground to remove your camera are not practical. Avoid them, unless you specialize in cinematography. Cinematographers will create more time in a place just to film it properly. Otherwise, some locations won’t afford you the space or privacy to open and expose your equipment. Tip: I’m in love with the Manfrotto NX CSC Camera Backpack. It’s compact, keeps everything organized with top and back loading entrances to the bag. (check out my review)
7. Do not assume you can “buy replacement gear” when you arrive.
Before traveling, ensure your travel vlogging equipment kit checklist includes backup batteries and charging cables. Some countries may lack Apple stores or offer electronics at higher prices in airports. Moreover, be mindful of varying plug types in different countries. For instance, when I purchased a Mac laptop in Hong Kong at an Apple store, it did not occur to me that it would come with a Hong Kong plug adapter , which required a specific plug adapter for use in the U.S.
Tip: B&H Photography delivers internationally, so if you need to replace a piece of gear, you may consider this option. Amazon may also be an option if you are staying at a hotel for a set number of days. Keep in mind, you may need to open an Amazon account in the country that you’re sending to and their international partners are limited! Amazon operates in over 20 countries, such as: United States, France, Italy, the United Kingdom, Turkey, India, Saudi Arabia, Japan, Singapore, Mexico, and Brazil . Here’s their international shipping policies.
Anything can happen on the road. You can lose your camera, your external drive can get banged up and corrupt, someone can steal your luggage …and whooops there goes all your hard work, planning, and expense. I like to take two 2TB SanDisk Extreme Portable SSDs and split them up in two bags. They are wallet size and super durable and slim so you can stash them inconspicuously in many things. It allows you to edit and transfer footage anywhere– even on the toilet. TMI, i know. But I’m in love with them!
travel vlogging tips: sandisk extreme portable ssd is lightweight storage for adventurers
9. Capturing the details is key to a good story.
With vibrant landscapes and exotic cultures unfolding before you, it’s easy to get sucked into getting cinematic portraiture as your broll. Wide shot, wide shot, wide shot… can get boring for YouTube audiences. If you are planning to film your journey for YouTube and not a travel documentary like Baraka, you will likely need more activity, emotions and dynamics to fuel a story.
Find the story in your journey, the destination, its people and culture. If you see holy men on the steps of the Ganges from your Ganges sunrise boat cruise, use your lens to probe deeper into their lifestyle, the ornaments they wear, their actions. A cultural festival has deeper meanings to locals than it does tourists, so probe, probe, probe with your lens. Get close-ups of details! These also make great b-roll.
Pick a story and follow it through to give your videos more insight and a deeper meaning.
Always ask permission before you film locals. It’s tempting to just film people without their awareness because you want to capture a beautiful moment and once they notice a camera, they botch that authenticity. But still, it’s their right to their privacy. I’ve certainly had my moments when I was naive and took photos in secret. Some countries, the locals are happy to have their photo taken, but others may not be. The more western you go, the more stringent the rules get.
Japan can be a challenging country to film, as there are many “No photo” signs up at marketplaces and eateries. Shops and locals may not appreciate being photographed.
I worked with a sponsor who wanted me to promote one of their many cooking classes in Tokyo. The vendor (aka “cooking teacher”) they chose, who was giving the cooking class agreed to let me film with the possibility the experience could show up on my YouTube channel. However, I didn’t have a filming permissions or media release contracts in place. To shorten a long story, a few years later I decided to edit and publish that trip experience for my channel. A day after publishing, the vendor contacted me to request I pull the video down. He had a nasty split with the sponsor and didn’t want to be associated with them. I asked if there were ways I could re-edit it. It was possible to remove the sponsor as they had gone out of business during the pandemic. But no. Was it a personal whim or bigger spat ? As I did not have a signed contract, I did the honorable thing and pulled the video. But it sucked royally. I paid to film, produce and edit that video with my personal time and money. I lost money on that video.
The U.S. is another country, where natives don’t like their privacy probed by lenses to the point they have no problem jumping into a lawsuit. It certainly adds to the challenge of filming inspirational travel videos.
I know it’s awkward as hell as a solo female creator to break into a very Real moment that you witness and say– Hey, is it okay if I film you? It’s a cold shower to the moment and ends whatever real thing you were hoping for.
Filming a YouTube video to fit professional legal standards is a gray line for most creators. You’re paying out-of-pocket for your trip’s expenses, for what can be considered a home video and you might not be making any money on it. Travel vlogging is an investment.
But if you’re hoping to monetize your videos on YouTube, learning the legality of things helps!
Note: If you are on a paid campaign or assignment, you must request permission from anyone you film. I know in some countries a head nod is the closest language to permission as it gets. Ask if you can film them stating their name and contact number on your recording, in case you ever need to follow up.
Tip: Jotform and Google Forms are free to use and set up a quick talent permissions form.
11. Prepare for all outcomes
Travel is exciting to shoot because you never know what’s around the corner. The downside is that things don’t always go as planned either. Equipment failures happen when a situation arises that you did not expect.
If you have a content assignment that is paid or work-based, you don’t want to miss a moment and risk a part of your gear going down in the field. When my DSLR died – twice– under the Bangkok humidity, finding a Canon repair shop to get it fixed took a good chunk of days, stress and wasting time in a search.
On one trip- my first planned solo trip– I had to buy a new point-and-shoot camera, so that I could at least get memories of my trip. It turned out to be a bombass Samsung ST500 camera that wasn’t yet in the U.S. and ultimately, I used upgraded versions of it for travel vlogging! It was a blessing in disguise but it was still time and stress, frantically running around shopping malls when I wanted to be exploring Thai temples!
Today, I travel with two vlogging cameras , and most definitely, if I am on a paid campaign! I’m prepared if one of those cameras go down.
12. Prepare for the weather
Weather changes should always be prepared for when you’re packing sensitive camera gear.
Know how your gear and batteries react in different weather types. Winter and snow wear your batteries down quickly, so going on an Arctic roadtrip with Mazda, I bought more batteries. This type of weather also causes lens fogging- when going from outdoor cold to indoors. It can also create brittle plastics– I broke a clip on my extreme selfie stick!
Keep your equipment dry from humidity, condensation and rain are not good. They can cause the fine instruments in your gear to go wonky or corrode. If moisture is trapped in your lens over time, it may be subject to lens haze, a contaminant effect of your lens developing a fungus that makes it look foggy.
Tip: I keep silica gel packets in my camera bag when traveling through humid and moist weather, to keep the moisture from being locked in. These silica gel packets act as absorbers and dehumidifiers. You can order them by packet or save up the packets that come in the packing of new items.
Protect your camera lenses from lens haze: silica gel packets to dehumidify camera lenses
Alternate solution: Buy silica gel dessicant. It’s a tiny container with holes for the gels to absorb condensation, but make sure the container is sealed. I bought one at a camera shop and when I dropped it. All the tiny silica gel marbles scattered throughout my room and I had to worry about my dog finding and eating them. But I have em!
Silica Gel Dehumidifier Desiccant
13. Insure your camera gear
If you’re wondering about how to start a travel vlog, you need to think not only on the creative end, but about your business and its tools. What are the odds something could happen to your camera equipment gear when you’re on the road? Homeowner’s Insurance is a popular insurance for covering camera equipment. However, not everyone owns a home.
I purchase World Nomads travel insurance for its tech equipment coverage for lost, stolen or damaged gear. It also doubles as trip insurance!
14. Remember to wipe your lens
This sounds soooo simple. It’s easy to forget to wipe your lens, when you’re running around famous landmark sites and content gathering gets demanding.
Smudges don’t always show up on your camera viewfinder when the sun is beating down on it, which often it is! But they are visible when you edit.
Tip: Be sure to clean your lens with a lens cloth at the end of the day, the start of it and the middle. Do this to your iPhone cameras too! (ai… this one is easy to forget)
15. Check camera settings
Checking your camera settings at the beginning of each day while traveling is crucial to avoid mistakes that can become troublesome during post-production. When you’re in a new and exciting location, it’s easy to forget to adjust your camera settings, leading to overexposed or underexposed shots, blurry images, or incorrect white balance.
Additionally, it’s easy to accidentally knock your settings off if you’re in a rush. If you have a camera with knobs, be careful that they don’t accidentally catch on something and turn your notice. If your camera has touch screen menus, then be sure while you’re operating it, you don’t accidentally swipe a feature and turn it on.
On a recent trip, I shot all super-wide footage on a GoPro because I didn’t realize I kept knocking my settings off. Such a rookie mistake! I can rush, when capturing footage as there are many places I try to film in one day. By taking a few minutes each morning to review and adjust your camera settings, you can ensure that your footage is of high quality and ready to use without spending hours fixing issues later.
Here are camera settings to consider:
Exposure: Check your aperture, shutter speed, and ISO settings to ensure proper exposure for the specific lighting conditions you’ll encounter throughout the day. Night time is challenging. Use a higher ISO in low-light situations .
Focus: Check your focus settings to ensure your subjects are sharp and in focus. Consider using manual focus for more control, especially in challenging lighting conditions or when dealing with moving subjects.
File Format and Resolution: Choose the right file format and resolution for your needs. RAW and 4K/60 fps files offer more flexibility in post-processing and look better tracking motion, but they take up more space on your memory card. I like to keep my settings at Full HD (1920 x 1080) 1080p and 60fps but sometimes, my hand accidentally changes it to 30fps, which drives me nuts! If using a GoPro, make sure you are not on the super-wide settings unless you mean to be. The menu is super sensitive and easy to accidentally nudge or swipe a setting. This was a mistake I made on my last trip!
Battery and Memory Card: Make sure your battery is fully charged and your memory card has enough space for the day’s shooting. Carry extra batteries and memory cards to avoid running out of power or storage.
Image Stabilization: Enable image stabilization if your camera or lens has this feature, especially when shooting handheld or in situations with potential camera shake.
Audio Settings: If you’re recording audio with your camera, check your microphone settings and audio levels to ensure clear sound quality.
By taking the time to review and adjust your camera settings each day, you can avoid common mistakes and capture stunning footage that requires minimal post-production work. This preparation will ultimately save you time and help you tell your travel stories more effectively through your vlogs.
Conclusion
By being true to myself and my journey, I’m confident that my solo travel vlog will continue to grow and inspire others. As a YouTube coach, I’m passionate about helping fellow female travel vloggers achieve their dreams and rise to the top of the travel vlogging community.
What recommendations would you add to this guide on Travel Vlogging tips for beginners and how to start a travel vlog?
Anti-theft Cross-body bags are ideal bags for solo travelers, who want to be stylish and pickpocket-proof. Here’s five cross-body bags for travel which you’ll love for its compact ability and lines.
This past month when I spoke at a travel conference, I knew I wanted to my bag to be a compact organizer, with a stylish business-friendly look. I wanted a cross-body bag that allowed for a laptop and/or tablet. Here’s what I found.
The Baggallini Comrade 3-Zip Crossbody bag is for the tech jetsetter. I used this as my speaker conference bag and carried my 15″ Mac laptop in it. I usually have expandable bags and this was my first flat purse with organizer compartments, so it took a little bit of getting used to. But the sleek lines offered a professional look I loved. There are pockets to hold your mobile phone and there is even a hidden pocket in the back of the bag.
The Ameribag Classic Healthy Backpack bag is not a flat bag, but and compact expandable bag. It’s a super handy bag that I’ve used over a decade and for several purposes. I have two and it lasted two decades! This microfiber banana-shaped bag hugs against your body so the entry to your bag is always protected. This bag is an all-time favorite because it expands to hold many things from a camera to a jacket and more; it’s like a mini-daypack. It has multiple side pockets inside the wall of the bag, so you can organize your items. This was my original camera bag when I was just toting a DSLR and blogging, but I also use it as a quick reach utility bag on set or video productions. I love them!
Ameribag Classic Healthy Back bag
3. Baggallini Anti-Theft Harbor Crossbody Bag
Slightly similar to the Baggalini Comrade 3-Zip Crossbody is the Anti-Theft Harbor Crossbody Bag. This minimalist flat bag has locking zippers and slash-resistant material. Secret pocket on the backside as well. This is easy and light-weight to pack for a night in the city when you don’t want to be bogged down a lot of extras.
Baggallini Anti-Theft Harbor Crossbody Bag
4. Baggallini Horizon Crossbody
The Baggallini Horizon Crossbody is a favorite of many with a variety of colors. It is machine washable with sturdy fabric, water-resistant and two medium-sized front-facing pockets where you can put a water bottle. It includes a wrist bag so you can opt to leave your bag in the hotel and go with a clutch.
Best Cross-body bags for travel
5. Travelon Anti-Theft Classic Slim Double Zip Crossbody Bag
Travelon Anti-Theft Classic Slim Double Zip Crossbody Bag is a multi-functional 5-Point Anti-Theft security system that you can wear three different ways: as a backpack, shoulder bag and cross-body bag. The bag has locking zippers, is slash-resistant and has RFID blocking. Dimensions are 9×10.5X 1 and ideal for holding tablets.
Travelon Anti-Theft Classic Slim Dbl Zip Crossbody Bag
I put this responsible travel guide together to share responsible travel tips for the ethical traveler. If you took away one tip and practiced it or you shared this post with friends, you are helping alleviate the ongoing negative impact that tourism brings. I am continually furthering my growth in this department so please share your responsible tips as well.
Crowds, over-tourism, human zoos, animal/marine life abuse in the name of tourist entertainment, and the overburdening of natural resources… there are days I have a hard time feeling proud to be a traveler or travel blogger.
Traveling is one of the most enriching experiences in life. It allows us to explore new cultures, meet new people, and see some of the world’s most beautiful sights. However, as travelers, we also have a responsibility to ensure that our actions do not contribute to the negative impact that tourism brings upon destinations. Here’s some responsible travel practices to be mindful of on your next trip!
1. Research responsible and sustainable tour operators
Responsible tour operators want you to enjoy an authentic experience in an ethical way that does not burden, disrespect or exploit a destination, community or natural environment.
Sustainable operators build ethical and authentic relationships with local, indigenous and marginalized communities in an effort to bridge a traveler with an insightful and meaningful cultural experience, that also empowers the local community with a means of business income and sustainability. A sustainable operator will not exploit a culture or advertise the experience as if it were a human zoo.
Ethical tour operators can go under different keyword descriptions: “responsible travel”, “sustainable travel”, “ethical travel”, “conscious travel”, “regenerative travel”. Often, they’ll have a statement about their operational ethics on their website.
2. Research ethical tour operators before booking
Research sustainable and responsible tour operators when you book your tours. Although the list of ethical tour operators is still limited, it’s a growing industry. Sometimes, you can spot a responsible tour operator by their website. You can google reviews on the tour company as well.
I google “responsible tour operator” + (city name) to see if there are ethical operators in the city I’m traveling. If I’m working with a tourism board, I’ll request recommendations on ethical operators should they have any.
Intrepid Travel has a long-standing reputation for running responsible tours and working with responsible local tour operators. But sometimes you just want a day tour.
3. If it’s a “cheap tour”, proceed with caution.
It’s tempting to book your tour or activity with the cheapest tour agent you can find, but “cheap” are the worst offenders, when it comes to exploiting marginalized communities and animal labor/abuse. Most “cheap tour” companies are unethical, but you’ll find many camped out in this category. These businesses sell bucket list experiences that can sound like you’ll be visiting a three ring circus, but because they’re so cheap, they need to sell a lot of tours to make it worthwhile. That means any activity they are selling is overburdened with tourists.
“take photos with a tiger”= drugged and chemically sedated tigers (here are Tiger Kindom articles and a blog “ride an elephant” = stir-crazy, mistreated and broken elephants (if in Thailand – which is synonymous, here are ethical hands-off options) “visit a village tribe” = human zoo selling souvenir trinkets
The bottom line is “exploitation” of the human and animal kind. Budget day tours in Thailand are infamous for this! Click on this GetyourGuide page for Thailand tours and you’ll see how many activities feature elephants! The Thailand Tourism board finally wrote this blog post about things not to do in Thailand. Note: If you’re riding touching, bathing or interacting with an animal, it is not an ethical sanctuary or tour.If the activity is a trip to a Karen longneck tribe village – sometimes local tours sneak this in as a sensational attraction– it is basically, a human zoo of sitting for photos as tourists snap away at their long decorated necks! I am all for visiting ethnic and marginalized communities but it’s only helpful to them when your tourist dollars actually go to their community.
Respecting Culture & Community
4. Respect the local etiquette
Before traveling to a new culture, research their traditions and etiquette. Be mindful and respectful of their customs. Some cultures are highly conservative and wearing revealing clothes can be offensive or put you in a sexually loose light. Observe religious and cultural etiquette of entering temples, churches, and local homes. In cultures like Korea, there are customs with seniority or accepting gifts with both hands. In Thailand, you do not want to point your feet at the Buddha.
5. Dress appropriately
I like to dress to respect cultural dress codes. This means that I research the cultural etiquette in advance before packing my wardrobe. If a culture is a conservative, there are clothes I know to avoid such as spaghetti tank tops or short skirts. When visiting religious sites always dress respectfully.
6. Ask permission before taking photos of locals.
Before taking that snap of a local, ask permission first. Some locals do not appreciate it. Get to know the person you’re taking a photo of first or share a cultural interaction with them, buy sending them their photo or letting them look at the photo you’ve taken.
7. Respect local communities
Be respectful of the local communities and their way of life. Avoid disrupting their daily routines or being intrusive. In Laos, I witnessed tourists flock to take photos of monks taking alms. Some jumped in front of them with camera flashes as the monks solemnly walked in their procession accepting food from locals.
Photo tips: Avoid impeding a local’s daily life and work. Turn off your flashes in temples and when locals are participating in a religious event. Use a zoom lens or your automatic camera zoom to get in close.
8. Avoid treating ethnic minorities like a human zoo
You might be visiting a village or minority culture in which the locals are dressed in traditional clothing. Minority cultures are often treated callously as human zoos.
Ethnic minorities are not often respected in the countries which they settle in- Thailand, Myanmar, Laos, etc… In Thailand, Thai tour operators treat Karen longneck village visits like human zoos. They allow tourists to treat the villagers disrespectfully for shock value, because you are there to see their long necks, which is a symbol of beauty for the villagers. It’s really sad to see these local villagers sit passively for frenzied tourists, who snap photos of them and then in the next turn, blow them off with a huff when the longneck tribe desperately attempts to sell trinket souvenirs. Often they are not being paid much by the operators, if anything at all! But they allow this invasion and cultural disrespect for the opportunity to sell their wares and make an income. Although I was naive and enthralled at the time, there was something very disturbing and sad about both situations. My participation in that form of entertainment felt wrong, because it was.
Today, I am very wary of tribal visits unless it is through a responsible tour operator who I know is paying a fair wage and has established an ethical trade where travelers are educated on how to respect indigenous cultures.
Poverty tourism is another thing to watch out for. While it may seem kind hearted and tempting to see inside a slum, it’s not respectful or honoring to its residents. Even the poor have pride. If you do participate in this, research how much of the money goes towards local empowerment and a sustainable program to get local businesses on their feet. Make sure that children arent used as guides, as this keeps them from going to school.
Refrain from participating in activities that exploit animals, such as elephant rides or visiting animal shows. These practices often involve cruelty and mistreatment.
If you really want to do a desert safari and there are camel rides and camel carts, consider walking instead. Simple rules regarding animal interaction: do not pet, ride, touch, feed animals or marine life. In the past, I was quite naive about animal rides- I’ve ridden an elephant and camel thinking it was an exotic bucket list thing to check off my list. But that was before I truly recognized how these animals were being mistreated. Many of them look worn, go stir crazy, are separated from their offspring or worse, the offspring is made to work alongside them! These sad beasts are driven hard to meet the demands of the tourist dollar and vainglorious selfies! The cheaper the cost of the activity, the more the owner/company must overwork the animal to make profits. It’s not a good vibe kinda feeling.
There are several arguments which tell you that these animals are happy working, are authentic to the culture and help pay for the livelihood of poor families and their cost of being maintained and fed, but at the day’s end, they are captive, broken and overworked to do work for humans. Your tourist dollars support and vote for the continuation of their slavery.
Wildlife deserves to live wild, royal and free. These animals are royal beings with their own life.
Please consider this.
meghauli serai elephants
10. Appreciate wildlife in the wild
We all have expectations to see what is on our bucketlist. Many travelers want a guaranteed animal/marine life sightings on their excursions. Due to that pressure, unethical operators resort to tampering with nature to provide those results they’re reliant upon for their business.
Responsible operators and naturalists on the other hand, study animal/marine life behavior to know where natural habitats are and how travelers can appreciate without disturbing them. They aren’t results-focused but can still provide value if there is no sighting.
Animal lovers should consider booking activities which allow animals their freedom in the wild. Safaris are one way to enjoy a hands-off experience observing wildlife roam freely in their natural habitat.
11. Rule of thumb is: If you can feed, pet, bathe or take selfies with the animal, it is exploitation,
“If tourists stopped paying money for it, it would change the entertainment.”– Jane Goodall.
Before booking a wildlife activity, ensure you conduct thorough research. You don’t want your enjoyment to come at the expense of endangering species or harming wildlife.
When you choose not to support attractions that exploit animals, owners are compelled to seek alternative ways to generate revenue. Some argue that animals need to work so their owners can afford to care for and feed them. However, there is no evidence that owners are currently providing proper care. There is only a guarantee that the cycle of abuse will persist. When owners and fake sanctuaries can no longer profit from overworking their animals, they are left with no choice but to find alternative means of survival and may need to surrender the animal.
These days, elephant camps use the word sanctuaries, to evade the fact they are for-profit organizations, exploiting these gentle beasts by promising guest interaction with them. The rule of thumb is: if you can feed, pet, bathe or take selfies with the animal, it is not rescuing but exploitation. You are subjecting the animal to work for your tourist dollars.
Read wildlife tips for the ethical traveler
12. Respect local wildlife
When exploring natural habitats, demonstrate respect for the wildlife and their surroundings. Avoid disturbing or harming the animals and refrain from feeding them human food, junk food, or snacks. Additionally, be sure to remove any waste, such as plastics, napkins, soda bottles, etc., from their habitats.
13. Do not buy products made from endangered animals
Avoid purchasing products and crafts made from endangered or protected animals. Just because these items are for sale does not mean you should buy them. Your financial support sustains illegal and harmful activities.
14. Support conservation efforts
Look for ways to support local conservation initiatives, such as volunteering to do beach or city cleanups. You can find these volunteer groups on Facebook groups or you can do your own beach cleanup, by removing trash where you find it.
Instead of eating at chain restaurants, seek out family-owned eateries and mom-and-pop shops. This will not only support the local economy but also provide you with a more authentic travel experience. During a trip to San Juan, I asked the receptionist at my hotel for recommendations on where to find an authentic Puerto Rican food experience. Initially, the receptionist suggested a popular touristy restaurant that was quite expensive. I explained that I was looking for something “moderately-priced, popular with locals, and family-run“. The receptionist then directed me to a small restaurant owned and operated by their friend’s family. The food there was incredibly authentic and delicious, and I observed both locals and tourists enjoying their meals.
16. Shop Locally
When it comes to shopping, opt for local markets, grocery stores, mom-and-pop shops, and small boutiques. Purchase handicrafts from indigenous communities and artwork from local artisans.
By shopping locally, you not only empower the local economy but also contribute to a more sustainable travel experience. It’s best to avoid big international chains, as your money tends to flow out of the local community and sometimes, out the country. While it can be tempting to visit familiar chains like McDonald’s or Starbucks for a taste of home, remember that these big corporations can often undermine local businesses and communities.
Laos souvenirs
17. Engage with the local community
Interacting with the local community is an enriching aspect of solo travel. Take time to engage with locals, learn about their culture, and show respect for their traditions (see my experience of taking photos in developing countries). You can participate in local events, attend cultural festivals, or even strike up conversations with residents. By immersing yourself in the local community, you gain a deeper understanding of the destination and foster meaningful connections.
18. Eat street food
Eating street food is an excellent way to support local communities. Street food vendors are often independent businesses, so your money goes directly towards supporting their business, family, and community.
According to Wiego.org, “street vendors create jobs not only for themselves but also for porters, security guards, transport operators, storage providers, and others. They contribute to the city’s revenue through license and permit fees, fines, and various taxes.”
Tip: Keep in mind that street vendors often make very little profit. In some countries, they earn only a few cents per dish. To support them further, avoid asking for extra napkins or packaging as these add to their operational costs. If you want takeaway food, bring a ziplock bag, and carry extra tissues with you to clean up after yourself.
While it’s natural to seek a good deal when shopping, it’s important to avoid hard haggling and bargaining that may prevent vendors from making a reasonable profit. Never compromise someone’s hard work or livelihood for the sake of a discount.
19. Volunteering
Give back to the local community by volunteering or donating to verified local charities. Community volunteering projects such as building a house, volunteering time at a local animal shelter or doing beach and hiking trail cleanups are short term and easy to do. Most volunteer programs require weeks to months of committed volunteering, but there may be short term programs that are harmless to the recipients.
Although it may be tempting to hire local children as guides to support them financially, it’s crucial to respect the laws and regulations of each country. Official guides have undergone legal training, certification, and personal investment in their profession.
For instance, during my visit to India, I made the mistake of hiring an unlicensed guide who took me to potentially unsafe locations. In India, licensed guides are required to invest in their education and obtain licenses to guide at specific monuments. Similarly, in Morocco, my girlfriend and I hired a teenage boy as a guide, unknowingly causing him to evade police and licensed guides. We later learned that our actions jeopardized his education and future as if caught, he would end up in jail.
21. Avoid giving money to begging children.
Freely giving money to child beggars perpetuates a cycle that keeps children out of school and subjects them to street life. Instead, consider donating to verified nonprofit organizations like the Salvation Army that you trust and follow on social media.
22. Avoid “volunteerism” tours with orphanages
There are many voluntourism tours that offer visits to schools or orphanages, but it’s important to recognize that such visits can disrupt children’s learning time. As a former teacher, I know that there is little learning that can be done in such a short period of time. It takes months for children to truly learn from lessons. Additionally, children are to be handled sensitively, especially considering there are sexual predators out there. Any adults who handle or interact with children should be going through background checks; overall, any activities promising interaction with children- who are not your own- are not ethical operators. If any tour company sells you this type of experience, avoid it at all costs.
Support Environmental Health
23. Bring a reusable water bottle
Bring reusable water bottles during your travels. I always ensure to bring a reusable bottle to the airport, as many airports provide water refilling stations for passengers with their own containers.When I happen to buy a water bottle on my trip, I reuse it several times to make sure I’ve gotten a good use from it before discarding. I’ve reused my plastic water bottle for entire trips.
Tip: These days, I buy Pathwater– it’s actually 9.5 PH balanced water with electrolytes, but it comes in a light-weight, wide-mouth design for easy refilling, and easy to care for. Just hand-wash or shake with a few drops of dish soap and warm water, then rinse. Alternate options are: Nomader Collapsable water bottle or a Hydroflask Wide mouthed bottle
24. Use coral or reef-safe sunscreen with beach activities
Opt for coral or reef-safe sunscreen during beach activities.
Always be mindful of your waste and dispose of it in designated areas. Avoid littering and prioritize recycling whenever possible.
If you don’t see a nearby trash can, carry your trash in a paper bag until you find an appropriate place to dispose of it.
26. Homestay and Green hotels
Choose accommodations that prioritize sustainability and have implemented eco-friendly practices. Look for places that use renewable energy, recycle, minimize water usage, and have energy-efficient appliances like televisions and air conditioning.
Supporting sustainable accommodations can involve staying at family-run guesthouses, local bed and breakfasts, or traditional homestay.
“Green hotels” focus on maintaining an environmentally conscious establishment with minimal plastic waste. Some may even have sustainable practices, such as sourcing food from their own gardens.
27. Reduce water usage
Be mindful of your water consumption and try to minimize it whenever possible. Take shorter showers, turn off the tap while brushing your teeth, and reuse towels.
28. Conserve energy
When leaving your accommodation, remember to turn off lights, air conditioning, and other electronics to conserve energy.
29. Support eco-friendly tours
Consider engaging in human-powered activities such as biking, kayaking, or walking tours. These not only offer a unique perspective for sightseeing but also contribute to a more sustainable travel experience. Personally, I enjoy food tours that incorporate walking, allowing me to explore the local cuisine, burn calories, and connect with the community.
30. Choose sustainable transportation
Embrace walking, biking, electric scooter rentals or using public transportation options. This helps reduce your carbon footprint, supports local businesses, and provides opportunities to interact with locals, fostering a deeper sense of integration with the local community.
Conclusion
By incorporating these tips into your solo travel experience, you can enhance your journey while also being a responsible and ethical traveler. Responsible tourism is about minimizing our negative impact, respecting local cultures, and supporting sustainable practices. Let’s strive to leave a positive footprint as we traverse the world.
Share your responsible travel tips below! What are responsible travel practices you’d recommend?
Overseas ATM mistakes
Whether you’re jetting off to an international vacation or solo-ing on a business trip, it’s essential to have easy access to your money while abroad. International ATM withdrawals can be easy or tricky.
Navigating the complexities of foreign ATMs requires a bit of knowledge to avoid unnecessary fees, security risks, and other potential travel pitfalls. Recently, I traveled to Mexico, where you’ll find ATM machines at banks and private vendors where travelers can withdraw money.
I decided to film a youtube video on international atm withdrawal mistakes but I quickly realized that what applied to Mexico applies globally. Other than the Spanish language, there really wasn’t much of a difference in my ATM experience from Italy, Japan or Nepal..
I’ll share the dos and don’ts of international ATM withdrawals, so you don’t pay excessive fees.
Watch my 22 International ATM withdrawal mistakes you NEED to KNOW
21 International ATM withdrawal mistakes: DOs & DON’Ts
1. DO use a currency converter
Use a currency converter on your mobile phone like GlobeConvert or XE.com to decide how much to withdraw in local currency.
2. DO use bank ATMS.
Bank ATM machines have better conversion rates and lower withdrawal fees. Cameras everywhere and it’s safer as most people are there strictly to do their banking. Go during operating hours. That way if anything goes wrong with your foreign card being eaten, you can get support.
Atm withdrawal dos and donts
This is not always the convenient option but it’s safer with less fees. Private non bank ATMs tend to have higher withdrawal fees and bad conversion rates. But private atm machines are often found in convenient places such as convenient stores.
3. DON’T use ATMs in sketchy, dark areas or late at night.
ATM machines in questionable or unsafe locations carry potential risks. They are more vulnerable to be tampered with and if your card gets stuck or your money doesn’t come out, you’ll need to wait the next day for help. There is a scam called skimming where thieves place a card reader in the ATM machine to skim your information. This is why bank ATMs are preferred.
atm withdrawal mistakes
4. DON’T using ATMs in touristy areas
ATMs is in touristy areas have higher ATM fees.BBVA bank in Valladolid centro cost me $174 pesos or $9 USD in ATM fees. In downtown Bangkok, I used to occasionally withdraw money from Skytrain ATMs and the fees were $5 USD per withdrawal. This is just the foreign ATM. It does not include whether your home bank will charge you an additional ATM fee of a couple of dollars.
5. DO bring a backup card
Bring more than one bank/Debit/ATM card in the case one of your preferred card does not work. I’ve had this happen to me on several occasions. So I bring two ATM cards, a credit card and extra cash in USD, when going to cash based countries.
6. DO have a separate account and debit card for travel only
Of ATMs withdrawal dos and donts, this one is optional but I used to have an HSBC account for years because HSBC is a bank chain that is global. I was almost always able to find an HSBC ATM machine. Thus, I had a separate account for it dedicated only to travel. This was additionally nice to have as I had only reserve funds, so in the case anything was stolen, it was not my main bank account.
Note: I stopped using HSBC when my debit card grew to have pin code issues and stopped working. But instead, I got a Charles Schwab account and debit card that I use only for travel.
7. DO use a mobile translate app to translate the ATM in your language.
Download Google Translate app, a handy translation app I use for translations abroad. It has this camera tool which scans the foreign word and offers a translation. Sometimes, it’s a mistranslation but often, there’s enough keywords to get the gist. Asian language and alphabets can be a little more translation as there may have multiple translations to a single word.
Tip: You can also memorize the general steps of the ATM process.
8. Use an ATM that’s part of your bank’s network.
To avoid out-of-network and operator fees, choose atm machines that are part of your bank’s network. The machine often shows icons from networks, like Cirrus (which I remember because it used to be part of my credit union bank).
9. DO beware of Dynamic Currency Conversion
Dynamic Currency Conversion, or DCC is what travelers call a legal scam. It happens around the world, where theATM is trying to get you to accept their ATM exchange rate, which is always going to be a rip off overthe rate your home bank will give you.
Always chose to be charged in the local currency. They’ll pose it in a way which makes it sound you should, but the code word is DECLINE or NO.You don’t want them to convert in your home currency. Let you bank do that.
On my bank statement after I got home, what was taken out was $223 and not the $243 as the foreign bank quoted me. So the bank’s Dynamic Currency Conversion, would’ve charged me $20 extra. On top of their ATM fee which was exorbitant $9 fee
10. DO take out enough cash for the duration of your trip
To avoid atm withdrawal mistakes, you want to make sure you’re not returning to the ATM every two days to withdraw cash. ATM fees both from the foreign ATM and your bank back home can add up!. Usually I like to withdraw in two week increments.
11. DO Maintain distance with others when withdrawing money.
Make sure no one is standing too close and looking over your shoulder. Make sure you’re hiding your PIN when entering it.
12. DON’T forget your bank card in the ATM machine!
In the video you can see that I forgot my bank card. It doesn’t happen all the time, but it can happen when you’re in a foreign environment and juggling too much in your brain.
13. DON’T carry all your withdrawn cash on you while sightseeing.
Drop your withdrawn cash off at the hotel before going sightseeing.
14. DO Splinter your money and stash them in different places when you leave the ATM.
Have go-to stash pockets. You don’t want to keep all your money in one place in the case you encounter a thief. Don’t forget where you stash your money. For the money I know I’ll use, I like to stash it in a Banjees wrist wallet. and I always like to carry a money belt.
Tip: Use the same splintering and stash pocket technique with your luggage bag at the hotel.
When traveling there are so many things you’re juggling.Cash, credit cards, itinerary, rental car keys, hotel room card, etc… So many things to be mentally aware of that it’s easy to forget the basic things.
Havinga routine helps you entrain it into your body memory so your practices are automatic. Have your regular stash pockets, always put your debit/ATM in the same place, know the inside outs of whether you’ll withdraw cash from the airport ATM, order local currency in advance through your home bank, exchange a small sum of cash through the airport OR hold your breath and wait to get to your hotel to look for an ATM to withdraw cash from. The more you travel, the more it becomes a routine, so start yours today!
16. DON’T withdraw cash from airport ATMs.
Airport ATMs almost always have a worse conversion rate than bank ATMs in the city. The airport ATMs will charge you more, because they know travelers will want to withdraw local currency when they arrive. This is simple convenience that travelers won’t mind paying a little more for.
If you’re on a tight budget, hold off until you get to your hotel, to find a local bank .
17. DO occasionally break these money-saving rules.
If you’re an I-don’t-want-to-stress type of female solo traveler like me, DO break some of the rules I share with you here. Travel has many variables and you may have limited time for your vacation, where seeking out ATM machines in the city may not be worth the time you’ll lose in sightseeing.
I travel a lot of developing countries and there have been times that either, my hotel was nowhere near an ATM machine or the city I traveled had few ATM machines and they wouldn’t accept my debit card, my airport did not have an ATM machine (or accept my foreign debit card)… and I couldn’t use my credit card to take a taxi or public transportation into the city.
Thus:
–I have withdrawn small sums of money from the airport ATMs to tide me over for a day until I found a local ATM in the city.
–I have exchanged small currency at the airport exchange (in Myanmar) to have enough local currency to get a taxi into the city and to avoid money changers that were said to rip of travelers.
– I have gotten to airports which did not have an ATM machine and discovered the city had few ATM machines as well as that was new technology to the country.
– I have ordered local currency from my home bank because I was concerned the airport I’d be arriving into may not have an ATM (and I was correct!).
All these scenarios have happened and I’ve broken those rules to avoid what I felt was a greater stress and hassle. While saving money is great, there are times saving a couple of dollars are not worth your stress or risking your safety. The airport is sometimes, your one-stop-shop (i.e. ATM machines, foreign exchange, SIM cards, etc…) in preparing you for entering a foreign city. As a traveler traversing a foreign country- especially a non-western one- you must never assume that there’s a western standard and the convenience of foreign ATM machines that take your card.
18. Always keep your transaction receipt
Hold onto your transaction receipt in the case there is an error and you must show proof of what you withdrew in the case you need to contest anything.
19. Be aware of hidden ATM cameras and skimming devices
Always cover the keypad when entering your PIN and check for any suspicious attachments on the ATM before using it. There’s illegal devices called skimmers and they’re inserted into the card reader and can read your card (or skim your information) when you enter it. Make sure there is nothing in the card slot before using it.
20. Choose a bank with NO ATM FEES like Charles Schwab.
Choosing the right bank is the key to unlocking the best rates and minimizing fees. Look for banks that offer low or no foreign transaction fees and a competitive currency exchange rate. Trust me, your wallet will thank you!
Charles Schwab is one of the best known cards for travelers because it has refundable ATM fees. So any ATM fees you collect during your travels abroad is refunded when you get home. If you’re planning to open a Charles Schwab bank account for the debit card but you’re flying out next week, call their support number. They’ll be happy to send your card to your hotel at your final destination! (Note: there’s a lot of flexibility in the account terms. You’ll need to set up a brokerage and bank account at no extra fees or cost)
Tip: For digital nomads and expats who work abroad, you’ll be happy to know that the wire transfer fees are only $15, if you transfer money from your foreign bank to your brokerage account (upon signing up for a personal checking account you also get a free brokerage account for stocks and investments). Transferring money through your personal checking will cost $25; although ACH bank-to-bank transfers are absolutely free (even if you’re transferring to an international bank)!
21. Notify your bank!
Inform your bank or credit card company about your travel plans to avoid any unexpected surprises. Banks sometimes freeze cards if they notice suspicious activity, and the last thing you want is to be stranded without access to cash. My bank used to continually freeze my card when I traveled (even when I notified them). But they’d also flag my card when I used it to purchase things with companies that were headquartered in countries different from what I notified them about. So if I were traveling in Greece but bought a Turkish Airlines flight, my card would get flagged, because my bank was not notified I’d be in Turkey. Hostelworld was also another nightmare booking for me when I traveled because they are headquartered in Ireland.
Banking technology is improving however. My bank now offers the ability to update travel notifications and alerts in their mobile app. Check your bank to see if that is available in their mobile app too. It will save time and stress.
TiP: Download your bank’s mobile app and turn on your spending notifications to alert you of whenever you make a transaction. Always keep your bank’s phone number handy in case you need to Skype them from abroad. Build a relationship with your bank and a clerk who you can call when things go wrong.
How much should you withdraw when traveling abroad?
As a female solo traveler, I have a daily cash allowance of $40 USD/ day western country; $20-$25/day developing country. But this also depends upon the country economy, cash based activities and if I go shopping.
By following the dos and don’ts of international ATM withdrawals, you can make the most of your travel experience without the worry of running out of cash or falling victim to financial scams and excess foreign ATM fees.
Leave comments below
Spending time in the sun is a staple of any tropical destination such as Hawaii, Florida, Australia, and Mexico. But with the ongoing threat of coral bleaching and damage to the ocean’s delicate ecosystem, as responsible travelers, it’s important to consider the impact our sunscreen has on the environment. I know as adventure-loving but ethical solo travelers, you want to do your part.
In this reef-safe sunscreen guide, I share 10 best reef-safe sunscreens for travel and tips for buying real reef-safe sunscreen, so you can protect yourself and the environment on your next beach vacation.
Note: This post contains affiliate links which help me maintain my blog and provide free travel information. All opinions are my own.
Why should you buy reef-safe sunscreen vs any cheap one at your local drugstore
Whether you’re planning a trip to any destination where you’ll be swimming in a beach, lake or biosphere preserve, it’s important to know the sunscreen regulations beforehand. Hawaii has a law that bans sunscreen that is not reef-safe.
Cenotes and eco-parks in Mexico request travelers to use reef-safe sunscreen only or even better, avoid sunscreen altogether in an effort to respect and protect the natural environment and precious biospheres it aims to preserve.
According to reports, Hanauma Bay saw an average of 2,600 visitors per day, averaging a daily deposit of 412 pounds (about 50 gallons) of sunscreen. That’s crazy! Aside from Australia’s Great Barrier Reef, which experienced widespread coral bleaching, Hawaii, Guam, and American Samoa hit the worst coral bleaching records in 2017. The pandemic gave these environments some time to rest from ongoing bleaching, but now that travel has re-opened and tourism is flooding back, those records are threatened to continue rising.
Is Reef Safe sunscreen is a requirement at all beaches?
Hawaii implemented the Hawaii Sunscreen Ban in January 2021 to protect the coral reef. The law bans oxybenzoneandoctinoxatesunscreens.” – BiologicalDiversity.org
Mexico also has a restriction against non-reef safe sunscreen to protect their oceans and cenotes.
While these destinations restrict and ban unsafe sunscreen from their waters, this can not stop travelers from bringing and wearing their own dangerous sunscreens. You wouldn’t purposely use harmful sunscreens if you knew it damaged coral reef, which are the habitat and grazing grounds for marine life and endangered species, right? By making a small shift and buying reef-safe sunscreen, you’ll lessen the overall harm to the ecology by doing your part.
What sunscreen ingredients should you AVOID?
Harmful sunscreen ingredients to avoid include oxybenzone and octinoxate. Coral bleaching is brought on by oxybenzone and octinoxate. They can cause stress, harm, and ultimately destroy coral reefs, fish, shrimp, and sea urchins.
But other experts claim there are more common ingredients in chemical sunscreens which cause further damage, as well: homosalate, avobenzone, and octocrylene. These chemical ingredients that help keep the UV shield up while you’re in the sun are active ingredients that can harm both you and the environment.
What is the healthiest eco-friendly sunscreen ingredient?
If the above is hard to remember when you’re looking at an ingredient label, look for sunscreen with only one or two ingredients: titanium dioxide or zinc oxide. These are far easier to remember.
Not only are these safe reef-safe sunscreen ingredients for humans but they are the most eco-friendly and organic choice, as it is a so-called “mineral” or “physical” sunscreen.
These are what surfers wear but they can go on pretty thick and white. I have to do a bit of patting for it to absorb into my skin to look natural for regular daytime use when I go shopping or meet with friends, but I wear it in bold white streaks, when i’m engaged in water sports and outdoor activity.
Eco-friendly sunscreen: rio lagartos | I’m actually wearing clay but if you don’t rub in your mineral sunscreen, some may look like this. LOL
What is the difference between chemical and mineral sunscreen and why is chemical sunscreen more harmful?
Many folks prefer chemical sunscreens because they can be absorbed into the skin, but they don’t know that this option is more harmful. The chemicals soak into the skin to activate a chemical shield against UV rays. But absorption also means that you’re ingesting chemicals; they’re entering your bloodstream and pass through your urine, where it can have harmful effects for both your body and the ocean.
Mineral or physical sunscreen does not absorb into your body. When it is applied, it rests on the surface of your body, so you have a natural shield deflecting UV rays It doesn’t need other ingredients to activate under your skin. This is the ideal sunscreen, but the drawback that some folks may not care for is that it can feel thicker and leave a white color if you’ve not rubbed it in well.
The good news is that these days, there are more “tinted” color mineral sunscreen like Raw Elements Tinted Facial Moisturizer Sunscreen which blends into your skin while moisturizing it. So we can have now have our vanity, health AND environmental ethics.
False “Reef-Safe” Sunscreen Advertising Scams
Reef Safe and Reef Friendly sunscreen labeling are sometimes a fraud!
Today’s store shelves are covered in several “Reef Safe Sunscreen” labels. It’s even passed under the watchful eye of Hawaii’s sunscreen laws. These are just marketing gimmicks to get you to purchase them. The ability of sunscreen makers to destroy coral reefs is not required to be tested. Some claim to be vegan, organic, natural, or “oxybenzone/octinate free,” yet nevertheless include substances that are dangerous and are prohibited in Hawaii.
Examples of false- advertising sunscreens sold in local drugstores and on shelves:
Sun Bum Reef Safe SPF 50 Vegan Sunscreen (Do not trust the bum! Contains avobenzone and octocrylene )
Alba Botanica Hawaiian Sunscreen SPF 50 ( Sold in stores and Costco, but contains avobenzone, octocrylene, homosalate)
Hawaiian Tropic Antioxidant+ Sunscreen lotion( I once bought this because the Reef Safe sticker was shown beneath it in a large, bold. Complete con! It contains avobenzone and octocrylene)
Hawaiian Tropic Island Sport
tips for buying eco-friendly sunscreen
Buying Reef-Safe Sunscreen Tips
Shop online and read the ingredient labels.
You can more easily read ingredients while shopping online. For instance, Amazon lists components for their products. See my list of recommended sunscreens above, and then read the ingredient labels!
Avoid chemical and spray sunscreens.
The chemical sunscreens apply easily like lotion and usually have more dangerous ingredients for the ocean and you. They can accept a broad interpretation of “Reef Safe.”
The zinc oxide or titanium dioxide in “non-nanotized” (aka avoid nano zinc oxide and nano titanium dioxide) mineral sunscreens is better for you and aquatic life. These ingredients can be a little thicker as their job is to deflect UV rays; they require rubbing in and goes on thick, but it is better overall.
All Good SPF 50 Sport Sunscreen Lotion– I got the sport stick version- it’s large, so I cut a chunk and put it in a ziplock to take on my trip. It goes on a thick white and takes patting to blend more in your color. But it’s buttery, hydrating with good ingredients for healing the skin.
Bare Republic 50SPF sunscreen facial stick – Love this! Can be pat into your skin; nice matte, not greasy. I leave it in my backpack or purse when I’m on the go! It’s lasted a couple years
To change the state of environmental damage we contribute to on a daily basis, we can change our consumer habits and practices through baby steps:
1. Read the ingredients label and use only reef-safe or coral-safe sunscreen.
It might cost a dollar more, but it will go a long way- you will be doing your part to preserve our earth and waters. It typically takes hundreds of ocean swims to finish an entire bottle of sunscreen. Warning Tip: a lot of dangerous sunscreens are still on the market and will tout themselves as “Reef Safe.” Before making a purchase, do take the time to read the back label. Pay it Forward Tip: As I can’t pack liquids larger than 4oz on carryon, I donate my reef-safe sunscreen leftovers to the next tourist before leaving the beach and explain the importance of coral-friendly sunscreen. While i’m paying it forward, I’m passing on my eco-conscious awareness to the next traveler.
2. Do not use sunscreen at all.
If your objective is not to get a suntan, but to enjoy water activities like visiting a Mexican cenote (many are cave-like environments which do not see daylight) or diving (you’re spending time underwater vs above it), etc… you do not require sunscreen.
3. Rash guards
As I grow wiser with age, I love wearing rash guards for water and beach activities for various reasons from better coverage, cute fashion, moisture wicking and quick drying, better insulation when I’m in the water for long periods and I can use it for the gym too! My favorite is my Body Glove smoothie but I love the zip up rash guard as a very light-weight sun jacket (and it also cuts a cuter figure than the Body Glove).
rash guard best reef safe sunscreen for hawaii mexicoZip up rash guard
4. UV protection apparel
These days there are more apparel with UV protection and they are good to use, as added protection, such as long sleeved shirts and beach coverups. Popular brand are :Columbia Sportswear, Solbari, and Coolibar
5. Wide brimmed hat or GRRRLTRAVELER cap
I’ve always worn baseball caps (and GRRRLTRAVELER adventure caps) to shade my face from the sun. For my Mexico trip I bought a wide brimmed UV coated hat because I knew I was going to be in the sun for hours and Mexico can get hot. I like some fashion but also packability and functionality of not flying off my head on a windy day.
tulum packable travel hat
6. Organic beauty products
By consciously choosing more organic beauty products, we reduce our reliance on chemical products. Products like perfume, makeup and deodorant have chemicals that can be harmful, not only to our bodies but to the ocean as well. While it will take me a while to reduce my reliance upon products like Korean BB cream (i love Korean brands because they use natural herbs in their beauty products), I discontinued my use of manufactured perfume for lemongrass oil and lavender oil.
If I know i’m going into the ocean, I’ll avoid applying deodorant. I’m a heavy sweater, so unfortunately, I still carry a travel sized sports deodorant as a backup to keep my armpits from smelling. But I like to pack other substitutes like Crystal stick deodorant, a mineral salt stick that you just apply water to and rub on and Natural Aloha Pit balm, a plant based balm that is in a tiny balm container that is perfect to carry in a purse! I also just started using Schmitt’s Aluminum Free Natural Deodorant, I love the lavender scent!
7. Share this ecofriendly sunscreen guide with others
Let friends and family know how important it is to start saving our oceans and planet.
Despite ancient history, breathtaking natural landscapes, popular mountain trekking, delicious food and warm hospitality, Pakistan is often overlooked by tourists. However, the country has been gradually opening up to tourism in recent years. Before you plan your trip to Pakistan, there are things to know before traveling Pakistan to make your trip hassle-free, safe and enjoyable This guide shares essential Pakistan travel tips to keep in mind before traveling to Pakistan.
Note: I have not traveled to Pakistan yet, so much of this comes from research for my own trip preparation.
Things to Know before traveling Pakistan | Pakistan travel tips
1. Natural Beauty
Did you know Pakistan is home to some of the world’s most breathtaking landscapes? From the towering Northern peaks of the Karakoram and Himalayan mountain ranges to the stunningly, lush green valleys of Hunza and Swat, it is not known as the Switzerland of Central Asia for nothing!
Home to some of the world’s highest peaks, it attracts as many hardcore trekkers as Nepal. The country also boasts stunning lakes, such as Attabad Lake and Lake Saif-ul-Malook, and magnificent waterfalls, like the majestic Neelum Valley Waterfall. And the list goes on…
Attabad Lake, Gilgit Baltistan, Northern PakistanNeelam River, Gilgit Baltistan
2. Rich Cultural Heritage
If you’re a cultural enthusiast, Pakistan is home to a diverse mix of cultures and traditions, with a rich history that spans over 5,000 years. It has a Sufi heritage which gives way to the ideology of Islam.
Visitors can explore ancient archaeological sites like the ruins of Taxila, an ancient city that was once a center of Buddhist learning.
Archeologically, there are forts, shrines, mosques, tombs, stupas, monuments and petroglyph carvings to visit.
Faisal Mosque, Islamabad
3. Islam is the main religion
Pakistan is 97% Islam, with Hindus, Christians, Parsis, Sikhs, and Buddhists sharing the rest of the breakdown. As an Islamic character, you see mosques, palaces, tombs, and fortresses
4. Outdoor Adventure
Pakistan is an outdoor adventure lover’s paradise, offering a wide range of activities like trekking, mountaineering, and white water rafting. Home to some of the highest and most scenic mountain peaks in the world, many visit Pakistan for trekking. The country’s rugged terrain provides an ideal setting for numerous trekking routes that offer stunning views of the surrounding landscapes. I’ve heard the beauty even surpasses Nepal (gasp!)
K-2 is the second highest mountain in the world. Nanga Parbat, also known as Killer Mountain, is Pakistan’s second highest mountain with a nickname that has solidified its reputation as a challenging trek. But there are easier bucket list hikes that will garner epic views, like Fairy Meadows– known for its seemingly magical beauty- and Passu hike to Borith Lake where you’ll pass glaciers and Lake Attabad.
And this is just the tip of the glacier!
Nanga Parbat view, Gilgit-Baltistan
5. Pakistani Food
Pakistan food has Indian roots but its mixed with Irani, Afghani, Persian, Western and Mughal influences (check out this introduction to Pakistani food). It has a wide range of dishes, from spicy and aromatic curries to succulent kebabs and biryanis. Some must-try dishes include chicken tikka, nihari, and biryani.
Travelers should take precautions when it comes to food and drink. It’s advisable to avoid tap water and instead opt for bottled water, which is widely available.
Additionally, be cautious where you try street food, as it may not be hygienic. It’s best to have a food guide to introduce you to reputable spots but also be prepared in case you get sick. Bring your western antidiarrheal just in case. You can also visit the local pharmacy for any medication if you get sick in Pakistan.
Veganism is not a concept in Pakistan, as it is a largely meat loving country. However, there are dishes that just happen to be vegan/ vegetarian such as dal (lentil) dishes, lobhia kah salan (dish with black-eyed peas), pakora (fried vegetable fritters) and aloo paratha.
There are bean and vegetable dish variations prepared with various spices and curries: Shahi daal (moong dal), bhindi masala (okra), maashki dal, aloo chana (potato with chickpeas), lotus root curry, baingan ki borani (eggplant dish), chana dal samosa (see food photos here).
8. How to Get a Letter of Invitation for your Pakistan tourist visa
For a while, the only way to get your Letter of Invitation to apply for your Pakistan tourist visa was by being invited by a Pakaistani local or Pakistan tour operator. This is still the most reliable way. However, today there are a couple more options.
Some travelers have mentioned they applied with just their hotel details. However, some have also said they encountered pressure from officials, who claimed their visa was done the official way and wanted baksheesh (or side payment to look the other way). Those travelers lied to having no money on them and pretending to not know what the official was talking about. But that iffiness, lies and feigned ignorance is stressful. The last thing you want is to sour your trip and impression of Pakistan by dealing with is a sketchy official, just so you could shave a few extra bucks. Not worth it, if you ask me.
The other option is to hire a tour operators in Pakistan to issue you an official Letter of Invitation. For a small service fee, they will send you a Letter of Invitation (which also entailsa Tour Business License and a Sponsor’s Identity Card ) so you can rest-assured you’ve gone the official and fuss-free route.
9. How to Get a Pakistan tourist e-visa
Pakistan requires a Pakistan tourist e-visa for entry. You will not be able to board your plane without your visa.
You can apply for a Pakistani visa through the country’s embassy or consulate in your home country but the easiest way is to get a Pakistan tourist e-visa online via the Pakistan government website (if your country is eligible). Always use NADRA, the government site. You’ll be required to have a passport, passport photo and a Letter of Invitation and hotel/itinerary details. It’s not too different from getting an India tourist visa.
You can get a 30-day, single-entry or multiple entry tourist e-visa. The single entry visa itself is good for 3 months. Pakistan visa fees range (you can calculate your cost here).
The process of obtaining a visa can be as quick as a few days or it may take weeks. It is advised to apply at least three months in advanceof your trip, so you don’t stress about it.
Tip: It’s always a good idea to make copies of your passport and other important documents. I like to make both, printed and mobile photo copies. The latter gives me quick access and is great when your passport is at the bottom of your bag or back at the hotel.
10. Currency
Pakistan is a cash-based society and the official currency of Pakistan is the Pakistani rupee.
Foreign credit cards are not widely accepted although you may be able to use them at large western hotels and higher-end shops in urban cities like Islamabad, Karachi and Lahore.
ATMs can be found in large cities, but not all ATMs take foreign cards. Foreigners have mentioned that Bank Alfalah, Habib Bank, and MCB Bankare good for foreign ATM/debit cards.
Withdraw enough cash before traveling up north or to more remote villages as ATMs are limited, challenging to find and its dispenser may run out of cash.On the tour, it is advised to take out enough money before leaving the urban cities.
Order from your home bank: You might consider ordering Pakistan rupees from your home bank, to reduce your stress and have money when you arrive into Pakistan.
Foreign exchange shops take USD, Euro & popular currencies. Exchange money at local banks to avoid scams. Bring clean unmarked and newish looking bills. Large bills of $50 or $100 are advised as well. Otherwise, money exchanges will either not accept your bills or give you a bad exchange rate.
11. Urdu
The official language of Pakistan is Urdu. Although many people in Pakistan speak English, it’s still a good idea to learn some basic Urdu phrases, such as hello (salam), thank you (shukriya), and please (meherbani).
Safety and Security
12. Research, beyond the media
When I told friends I wanted to travel to Pakistan, they thought I was crazy- why in the world would you want to travel to an unsafe country?
Like any other country, Pakistan has its share of security challenges. You will almost always find something negative or scary in the media about Pakistan, just as it is with India, or Turkey, Greece, South Korea, Thailand, Myanmar, etc..
First, it is advisable to check the latest travel advisories from your country’s government before planning your trip to Pakistan. It is also important to get a fuller picture from the travelers and locals that are actually traveling the country in real time. Check travel blogs to research what travel bloggers have experienced.
While most of the country is safe for tourism, there are areas that are considered “high risk areas” and are off-limits to foreigners. These include the border regions with Afghanistan and India, as well as parts of Balochistan and Khyber Pakhtunkhwa provinces. These are places you would not generally go as a tourist and if you did, the government would send guards.
13. Security Guard Escorts for tourists
If you feel you want an escort, you can hire a security guard escort through a local operator. The Pakistan government tourism department sends security guard escorts to travelers who enter through Iran and travel Balochistan. or enter non-safe and tribal areas… areas where tourists shouldn’t be traveling. In general, you should not be visiting high risk areas.
14. Research travel forums and get local perspectives
Research and post your questions in Pakistan travel Facebook groups. There’s a different narrative going on in these “inner circles”. If you ask locals if Pakistan is safe, you’ll find many of them will respond with a resounding YES! They’ll tell you the hospitality of Pakistani people is overly welcoming and people will open their homes to you. While there high risk areas you should avoid, usually these are places you would not go as a tourist.
When I posted a query on safety in a forum, a local government tourism official corrected that the U.S.A travel advisory marked Khunjerab national border (by China) as dangerous, when it is in fact, safe. Locals know where the dangerous zones are and whether some warnings are well warranted.
Pakistan view
15. Warm Hospitality
Pakistani people are renowned for their kindness, generosity, and hospitality, and visitors often find themselves making new friends and connections, welcomed with open arms by the locals. Nevertheless, solo female travelers should show a little restraint as solo interaction does not always mean the same thing.
Pakistan is a fairly conservative country, so it’s important to dress modestly, especially when visiting religious sites and just traveling around town.
Both, men and women are recommended to cover their shoulders, arms, and legs in public.
For men, T-shirts and jeans/trousers or okay anywhere in Pakistan.
Women should wear loose-fitting clothes that cover their arms and legs, and a headscarf is recommended when visiting mosques.
The Shalwar kameez is a light-weight, loose-fitting shirt/blouse top and pants combination. If you’ve ever bought a kurta in India or Nepal, then you can likely use that. The shalwar kameez is the common local denominator of comfortable clothes, for both men and women (read tips on how to buy/wear one). It is an ideal outfit to navigate both, weather fluctuation and cultural etiquette.
Dress in the mountains and up north in the Gilgit-Balistan/Hunza area are a little more flexible, as locals are used to seeing tourists trekking in all kinds of clothes. For women, long sleeves are still recommended, but t-shirt wearing is okay only when trekking or engaged in physical exertion. No shorts for men or women however.
17. Respect local customs
Pakistan has a rich cultural heritage, and it’s important to respect local customs and traditions. For example, it’s considered impolite to eat or drink in public during the month of Ramadan, and you should always remove your shoes before entering a mosque or someone’s home.
18. Patriarchal country and strict conduct of propriety between sexes
Pakistan is a strong patriarchal culture. Families are very protective about their daughters and wives and so you won’t see many of them outdoors in public. Thus, you will notice a shocking population of men walking the streets and if you’re a female traveler, they may stare. This is something that I felt culture shock with when traveling India – it’s similar- and it took a while to get used to.
Thus, Pakistani culture has strict rules of propriety between sexes and there is little public interaction between them. If you are a woman, avoid shaking hands with men. Advice from local Pakistani women and female travelers who have traveled Pakistan will warn you that even a smile can be taken the wrong way.
Solo female travel and independent travel is possible for women, but one must be watchful and street smart. Flirtation with men won’t be taken casually and should be avoided.
Similar to India, sexual harassment can exist in a male hierarchical society like Pakistan. Female travelers who are naive and do not understand cultural improprieties, may be in for a rude awakening. This is why it is always important to research cultural etiquette before traveling Pakistan and dressing modestly to blend in is advised.
If you’re a woman, avoid sharing your personal marital or hotel details, phone number or email with Pakistani men. The advice feels similar to India in that it opens the door to potentially accepting sexual advances
I’ve read about women being stared at, being groped in passing or exchanging their phone number only to get a barrage of sexually explicit texts and inappropriate invitations.
However, it is essential to understand that sexual harassment is not acceptable behavior in conservative culture that Pakistan is. Men should not be misbehaving towards women.
Tip: Bringing it to public attention in a loud way, the community will bear down on the man and come to the woman’s rescue. If no one comes to assist, then be even louder and shaming so that people know he is a scoundrel.
Due to the strict code between the sexes and the possibilities of sexual harassment that Pakistani women face, there is a strict code of segregation to protect women from unpleasant situations. Look for the female and male sections. If you are the only woman who is surrounded by men in a train car, you’re in the male section. Leave and look for signs for the female section. there are female cars and male cars.
21. Transportation
Pakistan has a well-developed transportation system. However, it’s essential to keep in mind that road safety standards in Pakistan may not always be up to par with western safety regulations. Accidents are not uncommon and weather can affect road safety as well.
Buses can be crowded. It’s recommended to use a reputable taxi service or hire a private car with a driver. Some travelers like to bike or drive a motorcycle to get around. Just know road standards may change with the weather. Keep plans flexible.
When using public transportation, avoid traveling at night. If you’re renting a car, be cautious and avoid driving in remote areas or at night.
When visiting Northern Pakistan, you’ll be traveling higher altitudes and thus, may experience symptoms of Altitude sickness or AMS (Altitude Mountain Sickness). This occurs when there is a lack of oxygen in your body and it needs to acclimatize. Symptoms can range from nausea, vomitting, dizziness, headaches, physical fatigue, shortness of breath, rapid pulse, insomnia (read this Pakistan blog and Nepal trekking blog ) .It’s best to avoid physical exertion and acclimatize before going higher. It’s best to consult your doctor if you have any pre-existing medical concerns.
The first day I arrived in Ladakh– which runs parallel to areas of Northern Pakistan- it felt exhausting simple to walk from my hotel into town and my heart raced at night as I was going to bed. I had to take things slow for the first couple of days.
Hunza River | Gilgit Baltistan, Northern Pakistan
23. Be prepared for emergencies
Make sure you have travel insurance that covers medical emergencies and repatriation. I always carry a small first-aid kit of bandaids and antibacterial ointment. Know the location of the nearest hospital or medical facility. I like to always be aware of the local pharmacies; when i’m sick, I make a visit there.
24. Be open-minded:
It’s important to keep an open mind when traveling to Pakistan. It’s a country that is full of surprises, and you never know what kind of amazing experience you might have if you’re open to new ideas and experiences. On road trips and pit stops, you may come across squat toilets; always bring your own tissue as these spots may not have them. In more remote areas, there may be power cuts and limited to no access to WiFi.
In conclusion, Pakistan is a hidden gem that offers visitors an array of natural beauty, cultural heritage, warm hospitality, adventure sports, and delicious cuisine. Despite some negative portrayals in the media, the country is generally safe for tourists who exercise common sense and take necessary precautions. By following these guidelines, you can explore the country’s rich culture, history, and natural beauty without any hiccups.If you are looking for an off-the-beaten-path adventure, Pakistan should definitely be on your travel radar.
Can’t make my Pakistan trip dates but want to travel my itinerary on your own? Email me for tour information
What are your Pakistan Travel tips? What would you add to Things to Know before traveling Pakistan?
Writing about my Japanese capsule hotel stays, I got to thinking about more capsule hotels. The popularity of the concept has given way to airport sleeping pods.
But airport sleeping pods are temporary rest capsules that allow travelers to rest while waiting for their flights. Are airport sleeping pods worthwhile and will you try them on your next layover?
Airport sleeping pods vs capsule hotels
Sleeping pods have been popularized in the West but is similar to Japanese capsule hotels. They are similar in that they are temporary independent accommodations.
futuristic capsule hotel in tokyo
What are Airport Sleeping Pods?
Airport sleeping pods, also known as nap pods or sleep capsules, offer travelers a place to relax and sleep. They are pay-per-use short-term sleep capsules with various features and several airports already house them. They are ideal options when your flight has been delayed, or canceled due to bad weather or you have a long layover.
Many airport sleeping pods offer essential facilities for a layover and connecting flight passengers, such as luggage storage areas, power outlets for charging electronic devices, reading lamps, and occasionally public Wi-fi connectivity.
The sizes of airport sleeping pods vary. In some cases, they are so large that they resemble mini-hotels. Large sleep pods might also include a TV and a private bathroom!
Prices typically vary between $30 and $43 an hour, so you’re renting by the hour, much like a Korean love motel or a Japanese manga cafe (you gotta love Asia !).
Go Sleep Pods averages from 10-15 USD per hour and are located in Terminal 3 and Terminal 1 in the Al Dhabi Lounge at AED45.
Amsterdam Schiphol (AMS):
Yotel capsule hotel, main terminal in Lounge 2, near Pier D. Note: The property is closed through the end of September due to terminal construction. GoSleep pods in Concourse D.
Atlanta (ATL) – Atlanta International Airport, United States:
You can book Minute Suites pods to relax, work or nap in Atlanta international airport. Minute Suites provides a little more than sleeping pods but “suites” with a daybed, a TV, and a desk! Minute Suites at Gate B16.
Dallas-Fort Worth (DFW) -Dallas Fort Worth International airport, United States:
You can book Minute Suites pods to relax, work or nap in Dallas Fort Worth International airport. Minute Suites provides a little more than sleeping pods but “suites” with a daybed, a TV, and a desk!Minute Suitesat Gate D23. Pricing starts with an hour at $48. From then on, you are charged $12 per
Dubai (DXB)Dubai International Airport , UAE:
You can easily find Snoozecube or Go Sleep Pods at DXB. Snoozecube in Terminal 1, next to Gate C22. GoSleep pods in Emirates’ Maharba lounges.
Hanoi (HAN)- Vietnam:
Sponsored pods at the departures terminal.
Incheon ( ICN) – Incheon International Airport, South Korea ( 🎥 Check out my airport video):
Terminal 1: Basement floor of arrivals. Jjimjilbang. Terminal 2: DARAKHYU – 워커힐 capsule hotel; it’s more of a transit hotel. 60 free NapZone lounge chairs, Day hours (6:0a0~20:00), Overnight hours (20:00~06:00) , near gate 231, 264 on 4F at Terminal 2 and gate 25 and 29 on 4F, Terminal 1.
Free Shower facilities near gate 231, 264 on 4F at Terminal 2 and gate 25 and 29 on 4F, Terminal 1.
Check out the jjimjilbang in the basement floor below Departures for basic overnight and shower stays.
Istanbul(IST) – Istanbul Airport, Turkey( 🎥 Check out my airport video)
Sleeping pods by IGA SleepPod cabins at IST, cost between €6 and €9 per hour.
I have also seen a Yotel hotel inside the new Istanbul Airport. Book in advance here.
Helsinki (HEL) -Vanta Airport, Finland:
You can find GoSleep Pods at HEL between the departure gates 28 and 29 in the Schengen area of Terminal 2 and at gates 31 and 37.
London Gatwick (LGW) – England:
You’ll find Yotel sleep cabins or capsule hotels at Terminal 4 at South Terminal at Gatwick Airport.
London Heathrow (LHR)- London Heathrow International Airport, England:
Yotel sleep cabins or capsule hotels are located at Terminal 4 on Heathrow Airport at Terminal 4, ground floor.
Mexico City (MEX) – Mexico City International Airport:
izZzleep sleep capsules in MEX offer hourly and nightly rates, and even showers.
Sheremetyevo Airport (SVO)– Moscow, Russia:
You can easily find Go Sleep Pods at SVO at Terminal E, between gates 36 & 37.
Munich (MUC)– Munich International Airport – Germany:
You can find NapCity sleep pods in the Munich airport that offers a small bed with internet access and TV. Napcabs in Terminal 2 (Level 4 at Gate G06 and Level 05 at Gate H32).
New Delhi (DEL):Indira Gandhi International Airport (DEL) – New Dehli, India:
You can find (SAMS Snooze At My Space) sleep pod at DEL installed in Terminal 3 & opposite Gate 17 in international departures.
Philadelphia (PHL)- Philadelphia International Airport, United States:
Minute Suitespods at Terminal A-B link. Minute Suites provides a little more than sleeping pods but ” officetel suites” with a daybed couch, a TV, and a desk! Pricing starts with an hour at $48. From then on, you are charged $12 per
Toronto Pearson International Airport (YYZ) – Toronto, Canada:
Many free areas around Toronto’s YYZ to nap in from Free Sleep Pods to Energy pods and they’re built throughout the YYZ. But if you want showers and a regular night’s sleep similar to a hotel, they have Nap Stations which are literally rooms to rent with showers, Queen bed, television and ample space to walk around in.
If you’re on a business trip and want to get to your destination clean and fresh, an airport sleeping pod may be worth the splurge. Or maybe you want to try the novelty of one.
In many cases you are paying airport costs on top of location convenience. It might be cheaper to use your airport lounge pass, research a nearby hotel with a free airport shuttle pickup or if you have a really long layover, take a day trip into the city and book an actual capsule hotel.
There is an ongoing debate about what is better to travel with: backpacks or wheeled luggage. Good news~ you can have both! In this complete guide to wheeled backpacks, I’m going to share tips on finding the right bag for you and the six best-wheeled backpack carryons of 2022!
Between suffering plantar fasciitis, back, shoulder, and neck pains, I realized I no longer wanted to be a sherpa or snail carrying all my travel gear on my back. So I’ve used a trusty Eagle Creek Doubleback 22 convertible backpack for the past decade. Sadly during the pandemic, Eagle Creek went out of business and my backpack has now started to show signs of wear and tear. So I’ve been researching a replacement. I asked for luggage suggestions from my followers, which I have included here.
Complete Guide to Wheeled Backpacks
What is a Wheeled Backpack or a Convertible backpack?
“Wheeled backpacks”, “Convertible carryon luggage”, “convertible backpack carry on”, “rolling backpack”, “backpack with wheels” … it goes by several search names. But a wheeled backpack is a type of luggage that has wheels and can be converted into a backpack. Wheeled backpacks are perfect for travelers who want the ability to wear a backpack when navigating rugged and rocky terrain, but also have the ease and convenience of rolling their luggage.
Wheeled backpacks are also great for travelers, who have trouble lifting heavy objects or those who have chronic pain in their shoulders, neck, or back. Wheeled backpacks can be used as carry-on luggage on airplanes (provided they fit the airlines measurements) and they are also easy to store in overhead compartments.
Wheeled backpacks come in many different styles and sizes so there is one that will work for everyone. They range from small-wheeled duffel bags to large wheeled suitcases with multiple compartments.
The Benefits of Wheeled Backpack carryons
Great for short trips and traveling a variety of transportation (some which lack space!)). They alleviate your shoulders and backs and are ergonomically healthy.
As wheeled backpacks fulfill dual conveniences of both, wheeled luggage and backpack, they can be a worthwhile but often pricy investment. Also, wheels can make them a teenie bit heavier and bulkier if not in-set; however, you likely won’t notice it unless you’re wearing it as a backpack to avoid rocky or weathered terrain.
I’ve researched a lot of wheeled backpacks and the big problem is that although they are quite popular and ideal to use as luggage, manufacturers are reluctant to make many of them. Each time I find a prospective wheeled backpack, there is a limited supply on Amazon or the manufacturer’s site… or outright unavailable!
Note: Some of the wheeled backpacks I’ve listed below may already be in limited supply or unavailable as we speak!
Although are many variables to contemplate when finding the perfect wheeled backpack, can boil down to these simple questions about your travel style and what can accommodate you best.
Do you prefer to travel with carry-on luggage or checked luggage?
If you check in your luggage a lot, you’ll be more concerned with damage to your wheels. While many backpacks with wheels have durable wheels, looking for inset wheels or wheel covers for wheel protection (like the Hynes Eagle Travel Lite) will be of value to you.
Do you travel heavy or light?
Weighted luggage you definitely want a wheeled backpack. Travelers who pack light won’t have to worry about impaling their back with a backpack.
Do you use public transportation to get around or do you rent cars and hire Uber?
If you use public transportation a lot, the ability to maneuver in compact spaces is key. You best buy a carry-on-sized backpack with rolling wheels. Also, durable and water-resistant fabric as well as, a sternum strap and hip belt for your backpack are top things to consider if your transportation gets as rugged as your luggage being thrown on the roof of a bus or if you are continually running to catch buses and trains.
Do you travel in under-developed countries or first-world countries?
If traveling in a developing country with poor walkways you’ll be using a backpack often to hurdle terrain and durable, water-resistant fabric will be important to you. You’ll also want a hip belt and sternum strap to distribute the weight of your luggage. In a first-world country, the ergonomic support may not be as high of importance as you’ll be using the wheels more often.
How much do you normally pack?
Seasons can play a factor. Traveling during winter, you’ll need extra room for bulky sweaters, jackets, and snow boots!)
Compression straps help compress your bag’s expanse so it doesn’t get poofy and is able to fit into an overhead compartment. Think of how you might tighten a belt over loose clothes; same concept.
Hip and chest straps
Ever stood started to feel your backpack get heavy as your neck, shoulders and back got progressively more tired, irritable and crankier as you stood in a long immigration queue? This is when hip and chest straps really come in handy and show their value, as they provide extra back support while balancing the weight of your backpack more evenly.
Ergonomic design
Like a snail carrying its house on its back, similarly, you’re carrying a lot of your trip’s weight and clothing choices on your back, like a sherpa. Ergonomic design to fit the form of your back so you’re not tweaking your alignment is something to look at.
Ripstop, YKK zippers, zipper locks, and durable fabric are all good things. My convertible carry-on backpack has taken many knocks and has had to fit in tiny spaces.
Water-resistant
Being water-resistant proof is handy for light rain or to combat small spills. Note, however, that water-resistant does not mean that it is water-proof, but there is still peace of mind that your bag’s contents have some protection from the unpredictability of the weather.
Top Layer Pockets
Having a top layer pocket accessible to you on the outside comes in handy when storing items you’d like quick access to, like compression straps or flip-flops.
Standard Carry-on dimensions
The standard maximum dimensions of a carry-on is 9 x 14 x 22 (this is counting wheels and handle). However, you’ll find the weight change in different regions. For instance, in Southeast Asia, baggage limits are 20 kilos instead of the 50 lbs that most international carriers allow. Furthermore, you only get 7 kilos for the carry-on, too. Carriers do not always check weight, but when they do, they can ding you hard. Make sure your carry-on is within the limits. For Turkish Airlines, your carry-on limit is 55 x 40 x 23 and 8 kilos.
Grab handles
Grab handles provide a third conversion of the rolling backpack to carry-on. They are ideal to have so that if you’re running late for your train, you can just grab and go!
Features
Does your convertible carry-on rolling luggage have 360 wheels or grab handles? These can make a small but giant difference in the comfort of your travels.
Osprey is a favorite brand for backpackers and the Osprey Ozone Convertible 22″ is a convertible wheeled backpack, with an aluminum frame to support its large wheels. It has a backpack harness, hip belt, and back panel for ultimate carry comfort. You can remove the backpack harness and hip belt for extra comfort when you’re not using them! It has a top pocket for easy and quick access to items you want access to and a detachable daypack. It sports grab handles for convenient grab-and-go.
Compression jacket to keep everything compressed. It’s more of a framed suspension pack with wheels.
Dimensions: 22H X 14W X 9D inches
Osprey Ozone Convertible 22″/50L Wheeled Luggage
2. Hynes Eagle 42 L Travel Lite Rolling Backpack
As rolling backpacks seem to become unavailable as soon as they are mentioned I scour the internet for new ones. The Hynes Eagle 42L Travel Lite Rolling Backpack is a new find for me. I just bought it and while it is does not feel as rugged as my last convertible backpack carryon, I love the extra features: a laptop compartment with several compartments and a detachable laptop sleeve. The hideaway backpack straps come with a sternum strap and hip belt so your back isn’t bearing the weight of your pack. One of my favorite features is the hideaway wheel cover that wraps around the base of your bag to protect your wheels from getting whacked at. Lastly, the price is unbeatably under $100. Oh yeah, and it’s water-repellent too!
Although this bag only has 327 reviews on Amazon, it has a rating of 4.5 and the purchasers are happy.
Hynes Eagle 42L Rolling Backpack Wheeled Backpack Flight Approved
Watch my review of the Hynes Eagle 42L Rolling Backpack
2. Hideo Wakamatsu carry-on
Reader Jennifer H, says ” Water-resistant, dust-proof zippers, I’ve had the Hideo Wakumatsu carry-on for 10+ years and it has never broken or failed. It’s been through most of Europe, African deserts, and Central American rainstorms, and has always protected everything inside. Converts to a backpack!”
The stylish Hideo Wakamatsu carry-on is a water-repellent nylon convertible backpack carry-on with wheels, a retractable handle, and side compression straps. The backpack straps are concealed in a zip-up pocket so they are not dangling.
Dimensions: 19.5″ x 14″ x 9″
hashimoto Wakamatsu carry-on
3. Osprey Fairview 40 Women’s Wheeled Backpack
One follower said, “The Osprey Fairview 40 wheeled backpack gives you the best of both worlds. It is a softshell bag that has a retractable handle and wheels for mobility and includes a full backpack harness for the times you need to luge your things around, but a roller bag won’t work. The backpack harness is tucked away in a zippered cover so you never have to worry about catching the harness straps on seats in the airplane cabin or the turnstile in the baggage carousel. It has zipper pockets for items that make it very easy to access. It has enough room for a 7 days trip.” -Craig T.
Note: The reviewer spoke about the Osprey Fairview 65 (substituted for Osprey Fairview 36, which is just a different volume and size but its features are the same.
The Fairview 40 has a rating of 1,500 positives on Amazon with many female reviews listing how conducive it was to anywhere from one month to 16 weeks of continuous travel, making its small volume and size capable of meeting long-term travel needs for women. The backpack has two mesh water bottle holders.
Dimensions: 21X14X9
Volume 40 L
4. Osprey Farpoint 36L Men’s Wheeled Backpack
The Osprey Men’s Farpoint 36L is sister to the Osprey Women’s Fairview 40L. Both are carry-on compatible bags and light-weight wheeled convertible backpacks with storable mesh backpack straps and hip belts for breathability. Hip belts are wonderful!
There are top and side grab handles for an easy go and two front mesh easy access pockets. Compression straps outside and inside to keep everything compressed and snug to your body. Gear loops and lash loops for a yoga mat. Zip up top and front pocket for quick access to travel documents, a jacket, or anything you want access to.
Dimensions: 22 x 14 x 9
Osprey Farpoint 36 Men’s Wheeled Travel Pack
5. Gonex Rolling Duffel bag
Okay, it’s not a backpack but quite a good rolling duffle. The Gonex Rolling Duffel bagis made with high-quality PVC. It has compression straps on the outside and outside zipper pockets. There are grab handles, so you can grab it as you run for your flight!
The Matein Travel Rolling Backpack was made for two types of people- college students and for female traveler, who wants practical easy access pockets on their backpacks. Durable material, locking zippers, and four multi-directional rolling wheels, so your bag doesn’t crazy roll on you. There are two front compartment pockets and one side mesh pocket for a water bottle. One of the more inexpensive wheeled backpacks yet!
It has 582 reviews on Amazon with an overall rating of 4.5, which is good. Many people loved that they could fit a lot into this backpack; meanwhile, one of the complaints is that the bag can tip over when front-loaded too much.
Dimensions: 22 x 14 x 8 inches
matein rolling backpack
7. Think Tank Photo Airport International V3.0 Carry On
For the photographer and videographer packing equipment such as camera bodies, lenses and tripods, the
Think Tank Photo Airport International V3.0 Carry On is solid insurance for your gear’s protection. It stores quite a bit of camera equipment and chunky lenses. What you’ll love is that the wheels and many other parts of the bag are replaceable so you can ensure the longevity of your investment. There is a padded compartment that holds your laptop or tablet secure. It is a great field kit bag when you want to carry as much equipment as you need.
Although this will fit in an overhead bin, dimensions are a little large for carry-ons at some airlines, so you might want to consider that before buying: 17.72 x 21.65 x 29.53
Think Tank Photo Airport International V3.0 Carry On
What would you add to this list of best-wheeled backpack carry-on luggage?
As travelers, we are all potential victims of street crime, theft and pickpockets.
Thus, safety is a priority when traveling alone as a woman, and choosing a good anti-theft bag should be a consideration when visiting a new country for the first time or entering a country you know has pickpockets. Here’s anti-theft bags for travel in 2022.
I’ve been fortunate that with as much expensive gear and gadgets that I carry, I have always averted travel theft. But I’ve witnessed it and seen it happen many times to travelers, both naive and well-heeled ones.
Although anti theft bag brands can sometimes be more pricy, it is always best to be safe when traveling alone. It’s always good to be additionally cautious when protecting your valuables when you are traveling alone or to a foreign country known for picking pockets.
What features make a bag theft-proof?
What makes a good anti-theft bag are a variety of features to aid in the safety and protection of your valuables and personal information, such as hidden pockets, cross body, slash-proof, RFID blocking protection, sturdy locks and locks to fixtures.
A good theft-proof bag can have one or a combination of these features.
But ultimately, the important part is that you are comfortable using it.
What to look for in anti-theft bags for travel
1. Hidden and multiple pockets
I have forever been a fan of backpacks and bags with multiple pockets and hidden pockets on the inside liner.All my gear backpacks and daypacks have had – at the least- inside pocket nestled against the back of the backpack or an outside pocket hidden against my back. Pickpockets cannot enter it without notice. Bags with hidden pockets are great for stashing a money belt, extra cash and important documents like a passport.
Best anti-theft hidden/multiple pocket bags:
Leaper Canvas Crossbody Messenger Bag – This stylishly cute canvas messenger bag has a hidden pocket on the back, two outer access pockets for documents and note pads, the main compartment that fits a 14-inch laptop. Additional features are a combination lock, sturdy zippers, and an external battery charging port with a built-in charging cable.
It’s a very practical but fashionable urban-looking bag. You can carry it sling-style as a messenger bag or hand carry it. Measurements: 11.4 x 15 x 4.5in
Leaper anti-theft bag
NicGid sling Crossbody Messenger Bag– This outdoor backpack sling bag has a hidden pocket on the back and multiple pockets from access pockets to main compartment. It resembles a military bag and has a rugged build. It holds 14″ laptop and has a reversible strap with an anti-theft pouch to store valuables such as money, mobile phone, etc… Measurements:11.8in x 15in x 3.5in
Crossbody bags let thieves know you’re not going to be an easy target. A cross-body bag sits in the center of your gravity and offers you the option of wearing it on your back or against your chest. The latter lets your arms doubly ensure that no one can enter your bag against your guard.
Best anti-theft cross-body bags for minimalist travel
Travelon Anti-Theft Classic Slim Bag– TravelOn is a good brand for slash-proof bags. This Classic TravelOn Slim Crossbody Bag is a flat travel bag featuring five-point security: slash-proof body and straps, RFID blocking and interlocking zippers, and a lockdown zipper so no one can enter without your permission. The cool selling point for this bag is that it has convertible straps and you can wear it both, crossbody and backpack. Measurements: 9” x 10.5” x 1”
Waterfly Crossbody Sling Backpack – For those who love messenger-style crossbody bags, this Waterfly crossbody sling backpack serves as a sleek waterproof daypack for hiking and urban maneuvers. It has two mesh bag holders for a water bottle or umbrella and an adjustable and reversible strap that can carry a mobile phone (screen size under 7 inches). It has three outer access pockets so you can have items in convenient reach and there are a few pocket compartments inside so you can be organized. All over, it is a sporty toolkit bag for the minimalist who has many small items to store. Measurements: 7 x 3.5 x 15 inches
3. Slash-proof
Purses signal obvious money to any pickpocket and their straps are always thin. But Travelon is known to make great slash-proof purses with a wire mesh inside the lining, making it sturdier and unbreakable. Slash proof travel sling bag anti theft is good also.
Best anti-theft slash-proof bags for stylish travel:
Travelon Anti-Theft Classic Essential Messenger Bag– This simple and classic cut travelon anti theft crossbody bag is constructed with a water and dirt-resistant fabric and is ideal for the solo traveler who is on a simple mission… sightseeing. It also has TravelOn’s famous five-point security: slash-proof body and straps and RFID blocking so thieves cannot get scan your credit card and valuable documents. It has interlocking zippers and a lockdown zipper with one main compartment and an access pocket on the outside.
travelon classic messenger best antitheft bags for travel
Travelon Anti-Theft Cross-Body Bag, This simple travelon anti theft crossbody bag has a thin strap that is slash-proof. There are also interlocking zippers on the main compartment and two access pockets on the outside. Comes in a variety of print colors. Sleek, simple and stylish. Measurements: 14.5 x 12 x 1.5
These days, theft doesn’t only happen in the old school way of bag theft, but through the theft of identity and personal information, as well. Bags with built-in RFID-blocking technology give you peace of mind that your personal info is protected.
Best anti-theft RFID protection bags:
Baggallini RFID Journey Crossbody – Functional machine-washable bag with built-in RFID-blocking technology. There is a hidden pocket in the back of the bag as well as pockets to store smaller documents and credit cards. Simply cute, durable and lightweight, this is for the traveler who navigates with the essentials.
Baggalini crossbody journey
Baggallini Crossbody Bag Water Resistant Travel Purse– This Baggalini crossbody purse is made of durable and water-resistant nylon. There are many pockets so you can stay organized. The wide base is deeper front-to-back than the top, so when it’s loaded with items, the bag stands upright by itself. This is ideal for packrats, as it stores more than it appears to hold. It includes a detachable RFID blocking wrist purse. Overall, very nice, practical design and a popular choice for women. Measurements: 8.5 x 11 x 4.5.
5. Locks to fixtures
Anti-theft laptop backpacks with the ability to secure your bag to fixtures are a great feature to have. Additional features include sturdy and locking zippers for further security, knowing that thieves will not be able to open your zipper!
Pacsafe Metrosafe LS450 25L Laptop Backpack – Durable, water-resistant, the Pacsafe Metrosafe 25L Laptop backpack is a likeable and easy-to-love anti-theft backpack for any occasion.
Three access pockets with lockable zippers, slash-proof straps and two side pockets for waterbottle and umbrella. It has one RFID pocket that can be locked to fixtures and chairs so thieves cannot run away with it. The backpack has a non-descript demeanor to keep it from looking like a valuable bag and it holds a 15″ laptop. Travelers love it for its comfort, ability to store enough from a weekend to longer, its safety and quality. 9″H x 11. 8″W x 6. 7″D.
Want additional protection from travel theft?
SafetyWing travel insurance offers inexpensive trip insurance for digital nomads and vacationers. It includes COVID protection, with prices you cannot beat! World Nomads travel insurance however, covers theft. I’ve used the latter when I know my adventures will be rugged and a little iffy where travel theft is concerned. Read more.
Join the Worldette Party: Turn your travel dreams into a lifestyle & help others
In a perfect world, we wouldn’t encounter obstacles to live fully in our dreams. We wouldn’t feel crippled by fear, self-doubt or worry when it comes to taking that leap into self belief. And we would never utter the question — Can I? This month, I have the honor of being one of the ten travel experts at the 2013 Online Worldette Party!(more…)
lao kids Khmu village
One of my readers asked me what my top things to do in Laos were.
When I arrived in Laos, I wasn’t sure what there was to do either. Laos is largely rural; it has marvelous beauty, nice treks and subtle charm. Simply put, traveling Laos is to get lost and take your time soaking in the experience of it. But here a bucket list worthy of your next trip there. (more…)
찜질방 A guide to Korean Jjimjilbangs | Korean Bath house & Sauna
.
While living in Korea, I fell in love with Korean jjimjilbangs (aka bathhouses in Korea)! So I put together a guide to Korean jjimjilbangs for foreigners. The reason is that Koreans know how to make the spa experience naturally healthy, economical, community-oriented and just plain fun. It’s not just taking a bath… it’s a bucket list experience!
.
Guide to Korean Jjimjilbangs for Foreigners 찜질방
Bathhouses in Korea
Jjimjilbangs are 24 hour bathhouses in Korea, that also have spa facilities that can make the bath house experience feel like Disneyland. As the operating hours are 24 hours, you can also sleep in them.
1. Pay the admission fee
These Korean bathhouses charge a rate for day and evening. The evening is at least 2,000 won higher than the day rate and starts anywhere from 6p-8p, depending on spa. With your admission fee, you get a smock, two towels, a shoe locker key and you can stay up to 24 hours; anytime longer is charged a next day fee. There is no leaving and returning; once you leave, you will need to pay another day rate in order to return to the spa.
2. Get a smock and towels
You’ll get these items upon paying admission at a Korean bathhouse. Men and women have different colored smocks. Sometimes you get your smock/towels at the toiletries counter after entering the bathhouse locker area.
3. Get your shoe locker key
The shoe lockers are to store your shoes. Each key has an assigned locker. After securing your footwear in the locker, go into the bathhouse.
4. The toiletries counter/shop
Give your key to the Korean bathhouse attendant at the toiletries counter. She’ll exchange it for a locker key, which you will keep with you at all times as it will also act as a surrogate charge card in the case you want to buy anything in the jjimjilbang but didn’t bring money. In some Korean jjimjilbangs, you’ll get your smock/towel here.
In the case you forgot to bring a scrubber or soap, never fear. The toiletries shop sells toiletries, everything from scrubbing mits to facial masks. In some cases, they also sell drinks, light snacks and hard-boiled eggs!
Each person gets their own locker unit. The locker is about the size as a high school locker and fits a small duffle bag. It has a hook and mirror. The locker key has a spring wristlet so you can wear it either around your wrist or ankle. If you’re going to the Korean spa/bathhouse, you disrobe and leave your clothes and smock in the locker.
Locker areas: Dragon HIll Spa
.
Entering the Bathhouse… Naked
General rule of thumb of bathhouses in Korea : you enter naked.
You’ll see showers, scrubbing stations and mineral bathing pools in these Korean jjimjilbangs. Some Korean spas even have outdoor mineral pools (yes, you will be naked there too)
But it’s not like this is Germany! These Korean spas are not co-ed. Only the rest of the facilities are! This means you’re generally naked among your own sex. As nude as you are, it’s very non-sexual. Asians tend to have strong ties with family, so you’ll often see mothers scrubbing their children or grandmothers, scrubbing or being scrubbed by daughters.
Take a drying towel and your Korean jjimjilbang toiletries with you and place them on the scrubbing station walls or cubby holes (if there are any).
The Korean Bathhouse Ritual
1. Do a light pre-shower with a soap and scrubber.
2. Visit the bathing pools and sample the different herbal waters (or Infrared light stations), which have health benefits.
3. Ready for a scrub? Get your toiletries and take them to the scrubbing station, where you’ll see others sitting and scrubbing themselves down. Koreans take scrub baths seriously and after your soaking, your dead skin will be ready for husking. Don’t feel like a scrub, take a shower instead.
Many spas have an area with an ajumma, dressed in black lace underwear, who will scrub you down. They look a little S&M but the service is pure innocence. You will lie on a table and she will pummel massage you and scrub you down, removing dead skin in chunks like in a Moroccan spa. This is an extra charge, usually starting from around 20,000 won.
4. Dry off with you towel and go to your locker to change into your smock.
Exploring the Korean Jjimjilbang facilities
You’ll find various types of saunas and facilities. Some have DVD rooms for entertainment, PC bangs, game rooms, gyms, restaurants, Korean beauty salons, even golf courses. Some spas offer beauty packages, ripe with massages, facial treatments and other fun yah-yahs (read about Dragon Hill Spa in Seoul).
I love the saunas- each jjimjilbang has their own specialties. Watch my video to see some of the options.
Salt room at Silloam SaunaIce Room
There will also be a snack center where you can buy drinks and even snacks like patbingsu (depends on season), etc… A popular drink is something that looks like a cross between an iced coffee and/or herbal tea. Koreans love to drink them at jjimjilbangs as much as they hard-boiled eggs. I think this has to do with replenishing your body after the soaks and saunas.
Gym in a jjimjilbang at Dragon Hill Spa
Where are the beds in bathhouses in Korea?
Some spas have separate sleeping spaces for men and women. But there is always a co-ed option too. Basically, any floor or reclining chair real estate is open for sleeping. On a particularly crowded night (usually weekends), it’s not uncommon to sleep right next to another person (I’d just watch out on the flailing arms). Some Koreans fall asleep in the saunas.
In Korea and especially in the spas, a wooden block is your pillow and a mat or towel like blanket on the floor is your bed. Korean floors (aka ondols) are often heated.
Puksuwon Jjimjilbang
Korean bathhouse FAQ
Do they store luggage for you?
Yes and no. Depends on the jjimjilbang. Jjimjilbangs are 24 hour spas, nothotels. Some spas may accommodate you by putting it behind their desk. Others, if close to a transportation hub, might have a storage area, but don’t expect it to be in a secure room. Koreans however, aren’t known to be big on theft, especially in public areas.
Is there WiFi or charging outlets?
Depends on the facilities. At the very least, they’ll have a PC bang where you can use the internet via coin-operated computers. Some places might have many outlets for guests to charge; others might have a limited few. It’s best to bring a backup external charger to be safe.
What if I forgot to bring soap?
You’ll find the toiletries store in your locker room, fully equipped to sell all the common toiletries. Prices are standard to dollar stores (and Korea has dollar stores!).
How do I buy things inside the spa?
The locker key that you’ll keep around your wrist has a computer chip in it that will act as a surrogate charge card. You’ll tap it on the electronic pad near the register when you buy something and when you leave and return the key, the front desk will total your expenses.
How much is admission?
Each spa charges different rates but they tend to rate around 6,000 won to 12,000 won. In the evenings, the rates raise to the higher end of that spectrum. After 24 hours, if you’re still in the spa, you’ll need to pay the next day rate too.
Will people stare at me if I’m foreign?
If you’re foreign, you’ll probably attract attention, naked or clothed. Korea, for a long time, was a homogenous country. While there’s been more exposure to foreigners, it’s still largely homogenous. Things like tattoos and Brazillian waxes may turn heads as Korea is a conservative culture also and there is some stigma associated with these things. It doesn’t stop expats from frequenting these spas.
Overall, Koreans tend to be more fascinated with foreigners than look upon them with negative feelings.
Dragon Hill Spa (website) is one of the most popular jjimjilbangs in Seoul, offering a wide range of saunas, hot tubs, and relaxation areas. Its facilities are well-maintained and hygienic, and visitors love the variety of amenities, including a movie theater, arcade, and rooftop garden.
Siloam Sauna (Jung-gu, Seoul) (website) is famous for its traditional Korean bathhouse experience, featuring different themed saunas and pools. It’s known for its herapeutic hot baths.
Spa Lei(Mapo-gu, Seoul) Spa Lei is renowned for being a women-only bathhouse. Located in Gangnam. It offers an infra red sauna, saunas, and DVD room and offers a top experience in Seoul.
Looking for the best spa hotels in Seoul, then check this list.
How to Succeed at University Job Interviews in Korea
A few of weeks ago, when I tweeted I was undergoing a job interview in Korea. A popular question often asked by ambitious native English teachers in Korea is how to get a get a university job in Korea? Getting a job at a Korean university is prestigious, while also occasionally offering perks of extra vacation time, higher salaries and less teaching hours than a EPIK public school or hagwon.
“K******** University wants you to contact them ASAP about a job position. Please call them; they are a very good university.”
That was the message I got from Eun-Hyung, my Korean co-teacher, last April when I was in India. It was a university job I had applied for long before I left Korea. The position started March 1st and it was for a full-time lecturer in the Media Arts department, teaching Video and Animation. At the time however, my commitment was traveling India and getting my Yoga TTC program, so I’d written them to keep me in mind for future openings.
They did. November rolled around and thankfully, the university contacted me again. This time, by email. There had been many candidates vying for the job; but they were looking for the right person. They were convinced I was the one. My timing was perfect.
How to Get a University Job in Korea?
Can you get a job teaching something besides English?
Most foreigners in Korea teach English.
As a foreigner, getting a job offer to teach a specialty aside from English is unlikely. Not impossible. It’s just not a job that you’ll find commonly posted for non-Koreans.
Finding a position, which allowed me to teach my skill of expertise (video & media arts) was a rare instance. I’d still be teaching in English in a way, but as a prerequisite studio course the focus was split.
What makes a good candidate for a Korean university?
I won’t profess to know what makes a good candidate for a university job, since I already failed two university job interviews. Could be appearance, qualifications, degree background or whether you can balance a ball on your nose. With my recruiting university, their “right candidate”, fell order like this:
Application Process: How to get a job at a Korean university?
Each university has their own prerequisites.
Here’s what to expect:
1. Submit cover letter, photo and resume
2. Fill out an application (in one case, I had an application which was 8 pages full of essay questions!). Sometimes, they’ll request you use their online application and just a head’s up– Korea uses mostly PC and Internet Explorer (too bad to Mac and Safari/Firefox users).
3. Submit transcripts, copy of passport and documents via mail. You can send them by email if the school is okay with that, but often, they want the hard copy mailed directly to them from the institution.
What to expect at your job interview at a Korean university?
For Korean colleges, the first interview is to win department approval. But when Korea’s not sure if they want you, they make you jump through the hoops of ‘song and dance’. You gotta sell yourself.
Here’s some of the things I’ve had to do for other colleges:
1. Prepare and perform a 5 minute lesson and mock teach a class (you may or may not advance notice for preparation)
2. Interview in-person.
3. Be ready to answer questions, such as:
Why you want to teach English in Korea?
Why you think you’d be a good candidate if your background isn’t in teaching or English?
How would you handle a class in which some students know absolutely no English?
How would you deal with students who are unmotivated to learn?
How do Korean universities interview you when you’re their favorite candidate?
When Korea knows they want you, it’s like being recruited as a star athlete. No tryout or audition. You don’t have to sell them on why you should get their vote. They already know.
Thus, I was able to do a Skype interview with the department and was given one question. The next day I received an email acceptance letter, then handed to the administration office for the process of collecting extra documents such as proof of work, credits, etc…
Rather than be cocky however, a year in Korea conditioned me to err on the side of safety. With Korea, there are many “surprise reveals” at the last-minute.
How to read when Korean universities are silent?
Westerners have a tendency to think of silence as a sign of ‘disinterest’. For Koreans, silence is like waiting at a traffic signal. At any moment the light could turn green, so you keep your foot hovered over the gas pedal.
For some time, all was quiet. Aside from knowing I was their favorite candidate, I didn’t know much else, about my competition or the position. Salary, housing, vacation time, hours of in-class teaching vs studio time, extra responsibilities of the department… the terms of employment weren’t given to me nor was I receiving answers for my query.
An email arrived on January 3rd stating that my second interview would take place on January 12th with the head of the university… in Korea. Five or six other candidates were CC’d on the email, as well. This was my first time making it to the second round.
Wait. Rewind.
Interview in Korea?…In 9 days?!
Free flights and hotel to attend the university job interview.
Life was moving faster than I could digest it. Free trip to Korea? I felt weighted. I still didn’t know the terms of employment and within that pocket of silent wait, doubt entered my mind and I drafted alternate plans for 2012. Really good ones! A speedy return to Korea was starting to lose its focus. I was starting to feel dazed by my surrounding decisions.
Knowing I may ultimately need to change my dates, I booked a flight with Korean Airlines. I’d used them before and had to change my flight, so I know their service is top-notch. They won’t charge you a fee if you have to change your flight! No change fees, free in-flight meals, individual TV sets, great hospitality plus two free luggage check-in pieces! Airlines don’t get any better than Korean Air!
Flight to DaeguDaegu
When I stepped off the plane, two curious-looking gentlemen greeted me– Prof T.H.L. a young, quirky-looking video professor, fluent in English and Professor P., a kind and soft-spoken professor and head of the department. Tired from the long flight and lack of sleep, I mustered the enthusiasm for a greeting.We chatted in the car; and I realized they were immediately likeable.
The two men drove me to The Prince Hotel to check in. They walked me to my room, then bid me a goodnight, informing me they’d come to pick me up for the interview in the morning.
prince hotel daegu Photo: Colorful Daegu websiteMy first meal: mmm… soon dubu jigae (soft tofu stew)! I’ve missed you!
A second interview: Meeting the President of the University
One of the most prestigious universities in the city, the first campus was impressively large and upright. As one of the top ten most beautiful colleges in Korea and film location of K-dramaBoys over Flowers (it was the elite high school, where the top 1% of the wealthiest Korean families attend), it definitely earned its model ranking. It’s red brick western style buildings stood regal, commanding a sophisticated academic presence, reminiscent of an Ivy league college. With soft rolling hills and tightly manicured lawns, the campus held a distinct air of brevity and sunshine. A practically squealed in my seat, driving through it!
We drove up to the President’s building. It stood tall, quiet, intimidating, academic. I entered the office, flanked by my two department guardians. Foreign candidates of other departments, filtered into the waiting room, wearing razor-sharp suits; each, accompanied by a Korean professor or dean from the hiring department. A Berliner sat next to his Korean attendant for the German department, a Filipino woman sat in wait next to her Korean counterpart for the nursing department…
Then it occurred to me… this interview was IT. I was IT and the only. And there were no backup candidates to replace me if I decided not to take the job. This interview was for each department to get Presidential approval!
Inside the president’s office, the nerves melted away my surroundings. Separated by a long wooden table, three distinguished Korean men sat across me. The president looked like a Korean Roger Moore. Dignified. Neither smiling nor frowning.
What was my career experience previous to teaching?
What was my proudest career achievement?
Why do I like Daegu?…
Frankly, I’m bad at job interviews. I don’t give smart answers. I give honest ones and my brain was like a waffle… solid, but spongy with very shallow potholes. I was sure I made a bad impression. After my interview, Professor P disappeared in to the President’s Office. In five minutes, he emerged victorious. I got the job and the two professors whisked me off to celebrate the victory with a sushi lunch!
Terms of Employment
Usually, knowing your salary and benefits comes before the last interview, but meeting with the administration was our next stop. There, the head administrator laid out the terms before me. They were sparkly. Great salary, paid vacation of 3 months, 4 weekly classes, free housing, a requirement of one annual solo exhibition of my work for teacher’s performance. Paving a road to a career in academia came with a handsome package…
If I chose to take that road.
terms of employment
Meet with the department staff
The following week I was still in Korea, so I was invited to meet the department staff. Four male professors welcomed me in the faculty lounge and gave me a grand tour around the Media Arts building. We ended with a friendly chat over coffee at a café. This introduction was different from my first welcome to Korea. I really experienced that Korean hospitality I used to hear others talk about.
Classroom tourNot the office area but the lounge. Faculty offices are in a separate building.
Everything in the picture appeared perfect! A prime job at a university, working alongside cool co-teachers, my very own office (with a door), inspiring future artists as well as, developing my own work towards a solo exhibition. It wasn’t Seoul, but maybe that wouldn’t matter. My ideas were racing with lightning speed and excitement. This could work fabulously!
But just one thing burdened me … those alternate plans gave me a sharp tug.
Countdown to a final decision
I asked for a week to make my decision. Start date is March 1 and if I accepted the job, the visa process had to start on the spot. Everyone had hoped for a confirmation sooner, but sometimes, even perfect choices doesn’t make the decision-making process any easier.
Please don’t assume to know my answer just yet.
Actually, this post isn’t really about surviving a university job interview. It’s about surviving a decision.
How to get to Korea
Who to fly with
Korean Airlines
Free in flight meals, personal tv sets, care package (slippers, tootbrush and toothpaste, water bottle), 2 free luggage and no change fees.
Rental phones in Korea:
SK Telecom Roaming (website)
Low Fee of 3,000w/day+ low rates on useage (texts or calls)
*SK telecomm can be found in Incheon Airport, Gimpo Airport and Busan Airport.
Travel Resources for your Korea trip
Booking.com – Hotel bookings. No cancellation fees Safety Wing – affordable travel insurance with COVID coverage NordVPN – Online security and the ability to watch Netflix. Use “grrrltraveler” for 70% off 3-year plan + 1 month free Klook – Book tours in Korea and Asia Get your Guide – book tours in Korea Korea SIMs – for prepaid travel SIM Cards Korea Rail Pass – for getting around Korea
These days, there’s a growing interest in solo travel. Traveling solo can empower you, gain you more confidence and open a new world of travel freedom for you. But how to plan a solo trip?
10 tips for planning your first solo trip
1. Dress for respect and to blend in
As a female traveling alone, I don’t like to stand out, call attention to myself as a tourist or attract unwanted male attention. Dressing to blend into the culture helps others feel more accepting of you as a foreign traveler, it is respectful of the cultural values and it says a lot about your economic and cultural background.
Research the cultural etiquette and dress codes of the city/country you’re visiting.
Respect cultural differences.
Avoid provocative clothing in conservative countries- it may come across as disrespectful, sexually loose, or culturally inappropriate and you may encounter male harassment. Some cultures are sensitive about tattoos.
Temples and religious buildings usually have a modest dress code for both, men and women. Wear the appropriate attire on your visits to these places.
Avoid looking like a rich tourist. This can attract tourist scams and higher prices when you haggle. Sometimes, I like to go as far as “dressing down” (and more backpacker-ish), especially if I’m entering a country with a low economy.
2. Book accommodations in advance
While I am always prepared to wing my trip plans, I still plan my itinerary, especially when it comes to how I manage arriving into a country or city. Arriving into a new destination can feel disorienting. Leaving the airport you encounter a rush of emotions and activity. From taxi drivers and touts, crowds, language barriers, and cultural differences. Booking your accommodations in advance makes you feel safe and grounded by having a home base. It also makes you feel successful for having achieved the first step of solo travel- getting from the airport to your hotel.
Book your first couple of nights of accommodations. I like to use Booking.com. They have free cancellations up to a specific date, so if you don’t like a place you are not married to it.
See if your hotel has a free airport pickup service.
Write down the phone number, address and directions of the hotel in case your airport pickup service is not there or
3. Pack light
For solo travelers, it’s best to travel light. Traveling light helps you manage your luggage and navigate crowds with ease, and it gives you the freedom to use public transit (i.e. buses, overnight buses, trains) where luggage storage is limited. Traveling compact is also helpful when it comes to having to go to the bathroom (and not having anyone to watch your luggage)!
Take only what you need. I look at all the things I want to take with me and then I try to cut it down to fit 3/4 full (or 1/4 of space in my bag). This also allows me space for collecting souvenirs.
Safety is of the utmost importance for solo travelers. You’ll need to utilize street smarts and take precautions as you won’t have others to watch your back.
Most of us travel with gadgets like smartphones, laptops, iPads and cameras. Don’t flash them around but always keep them near to you.
Leave valuables at home. If you feel like you’ll miss it if you lose it or it gets stolen then don’t take it.
Make your valuables difficult to get to. Think of ways and travel gear that will help you make pickpocketing difficult. Every additional step to getting to your valuables lessens a pickpocket’s desire to steal from you.
Traveling with a partner may seem ideal because you know there’s someone watching your back, keeping you and your valuables safe. However, that’s can also work against you if your partner does not match your travel style or budget.
Travel insurance is always a good idea. Many travel insurance policies are basic and do not cover lost or stolen I use World Nomads Travel Insurance for adventure trips and SafetyWing for affordability and COVID protection. For U.S. citizens, it offers the most coverage at affordable rates.
It can be stressful if you’re rifling through maps and trying to figure directions out when you’re traveling.
Before leaving your hotel/hostel, have all your maps, bus numbers and routes planned. Ask your front desk or the concierge for assistance. Have them take a pen or marker to your map and scribble bus numbers and routes.
Google Map or Mapquest for your directions. If I don’t have online internet capabilities I will screenshot my maps and keep it in my phone. If you don’t have a data plan to use Google Maps on the road, take a mobile snapshot of the map and directions.
Having an unlocked smartphone (I have an unlocked iPhone ) helps immensely these days. Google Maps can be indispensable, even if you’re walking. Whip it out and turn on the voice navigation features. An unlocked iPhone can also double as a wifi hotspot for other devices.
Take the biz card of the hotel in case you get lost and need to hail a taxi back.
Check-in on social media to let folks know where you’re at. Social media is ubiquitous and friends check in at places anywhere from airports to restaurants and parks. These days in extreme cases of “missing travelers” (like the Nepal earthquake), many friends and family were checking out their loved ones’ Facebook profiles to see where they last checked in to trace the last place they were before the earthquake hit.
Fake it until you make it. The last thing you want pickpocket and thieves to see is a vulnerable and naive solo traveler. It could make you a target for scams and theft.
Strike up conversations with others and ask locals for help. Some of it will come out of sheer survival instinct and you’ll need it to get around. Remember, most people want to help you. I’ve found locals more trustworthy than merchants and taxi drivers.
While it might be scary to get lost, allow yourself to get a little lost. It’s part of the fun of travel.
I like to explore streets and markets.
Look for free walking and city tours.
Strike up a conversation. I meet and make travel friends everywhere from a hostel, to restaurants and cafe, even on buses going from one city to another. Sometimes, this has led to shared transportation, tours and accommodations.
9. Have backup plans
All the fears and hypothetical worries you have about traveling alone encourage us to formulate backup plans that might nip that scary idea in the butt.
Keep copies of important documents like passports in different parts of your bag, as well as online in say, Google Docs.
Take backup money and/or credit cards in case your ATM card doesn’t work or your credit card gets flagged.
I always have a backup plan with my family in case of the worst possible scenario. It lets them know of the steps they need to take, even in the case of death. Watch my video.
10. Smile
For whatever reason, you’re choosing to take a solo trip. A smile is a universal language and shows people you’re friendly and welcoming.
How do you plan a solo trip? Share your tips for planning your first solo trip in the comments!
10 tips for your first solo trip. Pin this to your Pinterest board
American travelers often pay a premium on travel insurance. World Nomads offers economic solutions for travelers who seek security and peace of mind. It covers 150 countries.
My new phone. Many Korean phones come with a Korean-English word dictionary
& subway maps for the major cities in Korea.
Warning: This is not a “How To” on getting a Korean phone. I’d probably call it a “How not to get a Korean phone”.
Solo Travel Tips: How to Catch a Bus in a Foreign Country | Myanmar
I love catching a bus in a foreign country! Somehow, the sights, sounds and smells of the landscape feel more vibrant and awakening. I feel alive!
Woosh, the scent of a produce market. Cruddle cruddle, wheels against a gritty dirt road. Clunkle, clunk, screeech… the old gears change releasing the perfume of burning oil and exhaust. Still, taking the local bus as a solo traveler can be a challenge, especially if you don’t know the language.
Penned under our expert traveler series, this guest post is written by traveler and expat, Claudi, who blogs for CoupleRTW. As Portuguese living in Angola for three years, they have written extensively about Angola and Portugal. She will be your Porto travel guide, showing you the best things to do in Porto.
Porto, in Portugal, is one of Europe’s most beautiful cities. The city is classified as UNESCO World cultural heritage due to its striking landscape with 2000 years of Portuguese history. Porto is bathed by the sea and the river Douro and is packed with historic landmarks and a unique culture. We planned the ideal itinerary to travel Porto in 48 hours so you can take the most of your time.
Here’s what to do and eat if you only have 48 hours in Porto:
Porto Travel Guide: What to do in Porto in 48 Hours
Start your visit by strolling Porto’s downtown where you will find most of Porto’s top attractions. The downtown has loads of spots to visit, but they are relatively close in walking distance. You can start your visit in Aliados and move forward to S. Bento station, from there you can walk to Santa Catarina street and the Bolhao market. In the afternoon climb the Clerigos tower and go to the bookstore Lello. After all this, you should relax by the river bank in the Ribeira and visit D. Luis Bridge.
Aliados
Aliados is a big square right in the center of Porto. It is surrounded by monumental historic buildings and in the middle of the square, there is a statue of D. Pedro the IV (King of Portugal and the emperor of Brazil). The biggest building in the square is the city hall, you will spot it easily it has Portugal’s flag right in front. The square has plenty of cafes where you can enjoy a coffee in the esplanade.
best things to do portoL City Hall Aliados
S. Bento Train Station (Estação de S. Bento)
Estação de S. Bento is Porto’s main train station and one of the most visited attractions. It is one of the most beautiful train stations in the world, due to its azulejos (tiles). In Portugal, azulejos is a traditional art of blue painting tiles, and you will find them in several monuments in Porto. The azulejos in the train station illustrate scenes of Portuguese history and life. They are quite beautiful!
Rua Santa Catarina
Rua Santa Catarina is the biggest Shopping Street of Porto. A good place to buy souvenirs and eat in one of the many restaurants and coffee shops you will find. One of the most famous coffee shops is the Majestic, a historic cafe (1916) with stunning architecture. A mandatory place to go when visiting Porto.
Rue Santa Catarina, Porto’s biggest shopping street. Photo: António M.L. Cabral Barao78, Creative Commons Share-Alike 3.0
Mercado do Bolhão
In the middle of Santa Catarina Street, you will find Mercado do Bolhão, the marketplace of Porto. The market sells fresh fruits and vegetables, flowers, bread, meat and fresh fish. It is a good place to discover Porto and the locals. The market is open every day except Sundays. At the moment (April 2018) it is closed due to maintenance, but will reopen soon. Nevertheless, market’s building is impressive and is worth a visit.
Torre dos Clérigos
Torre dos Clérigos near Aliandos square is a 75 m high tower that dominates the urban landscape of Porto. The tower was built in 1763 and is part of the Clérigos church. We strongly suggest you climb the 225 steps to the top of the tower where you will find a fantastic 360º view of Porto. It is a fantastic place to take photos and admire Porto’s landscape with the river and sea. You can also visit the museum and Clérigos Church.
Porto Travel Guide: Clerigos Tower
Lello Bookstore
Lello Bookstore is one of the world’s most beautiful bookstores, it was constructed in 1881 by the brothers Lello. The bookstore has a beautiful Art Nouveau style with a beautiful staircase. It became really famous for Harry Potter books and movies. This is the bookstore that inspired J. K. Rowling to create Hogwarts moving staircases.
Ribeira
The Ribeira is Porto’s gem, it is Porto’s side of Douro River. One the other is Vila Nova de Gaia, where the famous Port wine caves are. This is the most beautiful part of the city, very picturesque with the typical Rebelo boats and several bridges. It is a very pleasant place just to relax or have a bite. Or even catch a boat to see the Douro Valley.
Ribiera: Porto’s side of Duoro River
D. Luis I Bridge
D.luis bridge I is the most iconic landmark in Porto. The bridgewas designed in 1881 by Teofilo Seyrig, a disciple of Eiffel. You can cross the bridge to the city of Gaia and visit the famous Porto Wine Cellars. It is also possible to cross the bridge on the upper deck, but you will need to climb quite a few stairs to get there. However, we think it’s worth it!
After a full day, we recommend you to eat a Francesinha, taste cheese and Port wine. In the next day, we suggest going to Palacio da Bolsa, Palacio de Cristal and Casa da Musica.
best things to do porto: d luis bridge
Palácio da Bolsa
Palácio da Bolsa or Stock exchange palace is definitely worth a visit with its mixture of styles. It was erected by the commerce association of Porto in 1842 and used to be the building where Porto’s trader’s made business and where the stock exchange was located. Nowadays, you can visit it every day with a guided tour. It is a very beautiful building but its splendor is on the inside, particularly the Arabian room. It is one of the most visited monuments in the north of Portugal.
best things to do porto: palacio da bolsa
Gardens of Palácio de Cristal
The gardens and the palace are quite near to the city center, so you can easily walk there. The gardens have 8 hectares and are quite romantic with a variety of Botanique species. The park also has spectacular panoramic views of the river Douro.
Casa da Música
Casa da Música is a modern concert hall designed by a Dutchman Rem Koolhaas. It turned out to be one of the city’s icons due to its unique and impressive contemporary architecture. You can go to a concert or simply do a guided tour. The concert hall also has a restaurant that serves gourmet food. It is well worth the visit, it is the furthest attraction of our list but you can go by subway.
If you were able to do all these things in 48 hours we congratulate you 🙂 Your hours were well spent.
Portugal is a fantastic destination for foodies, it has delicious food, port wine and it is quite cheap, compared with other western destinations. Porto, in particular, has some characteristic dishes like Francesinhas, tripes, and feijoada (beans with meat). Although you can find them in different regions of the county, they are best eaten in Porto.
Francesinha: This is our favorite dish from Porto! It is a big sandwich, made with toasted bread, sausage, steak, ham covered with melted cheese and a spicy tomato sauce. It is delicious.
Fresh Fish: Portugal is surrounded by the ocean, so you will find plenty of restaurants by the sea serving freshly grilled fish with boiled potatoes and olive oil. Portugal is one of the best places to eat fish!
Feijoada: This plate is made with beans, pork meat, and a tomato sauce. There is different kind of feijoadas, feijoada à transmontana and feijoada Porto style. It’s a heavy dish but very satisfying. This is authentic, traditional Portuguese food!
Port wine Best you didn’t think about Portuguese wine, right? If you’re a wine connoisseur, then Duoro valley is one of Europe’s famous wine destinations and can take a day tour and book wine tours from Porto.
You can catch the subway from the airport to the city center which is pretty cool, and it only takes about 30 min.
Walking
Nearly every attraction on our 48 hours travel guide of Porto is in walking distance, except for Casa da Musica. It can be very tiring, so you have the option going by subway or bus to the main attractions.
Subway
The subway has stations in almost every monuments except for the Gardens of Palacio de Cristal. The frequency of the subways is about 5 to 10 min, so it is very easy to catch one. You can buy individual tickets or by a day pass which is the most economical option. Metro website here.
Bus
You also have the option of traveling by bus, they go everywhere in Porto with a big frequency.
Porto has a big variety of hostels and hotels, but the best option is to stay near the city center and the main attractions.
Nice way Porto hostel is a budget-friendly hotel for solo travelers it is situated right in the city center. It has breakfast included and is a good place to meet people in a wonderful environment.
Hi hostel Porto is a youth hostel very budget-friendly, it is a bit further of the city center but easily accessible by bus. It has laundry, self-catering facilities and parking space in case you have a car. Breakfast is included and it has a fantastic view of the river.
In case you want an upgraded hotel, HF Ipanema Porto is a good option. It is near Casa da Musica, it has comfortable and spacious rooms, good for couples and Breakfast is included. It is a good value for money.
Safety tips for Solo Travelers in Porto
Portugal is a very safe country, it’s something that we locals don’t even think about because we have it for granted. You can walk relaxed in the streets, even at night without being robbed. All the some we advise you to don’t forget your stuff in public places. So Porto and Portugal is a very safe destination for women and solo travelers.
Note: This post contains affiliate links to partners we use. It is at no additional cost to you and by clicking on them and purchasing something, you will help support my site’s work.
Pin to Pinterest: Best things to Do Budapest | 48 Hours Budapest Travel guide
41 THINGS TO DO IN BANGKOK (DOWNTOWN #16-41)
.
Downtown Bangkok has cosmopolitan and urban flair with a traditional heart. The architectural design of the cityscape is a mixture of both, paint worn old and brilliantly modern.
41 Things to Do in Bangkok | Part 2: Downtown Bangkok
Catch a 4D movie at the cinemas at Siam Square, or shop for technology at MBK. From boutique hotels to megamalls with modern shopping flair, the list of things to do in downtown Bangkok is endless, so I’ll show you some highlights and secret ways to make the most of your trip!
16. Fresh Markets
Exploring the markets of Bangkok, you’ll find fresh markets galore, where you can see ingredients important in Thai households and cooking.
17. Thai Massage
A definite must if you’re in Thailand is to get a Thai massage. The Thai massage is different from others and is a full body rigorous style. You’ll find massage places from parlors to streets and even night markets. Massages can start at about 150 baht/hour for a foot massage (depending upon where you go) and prices are based upon service), while a neck and shoulder massage are premium service but still cost you under $10/hour. Some massage parlors will use an acupressure method for your foot massage. Best place to get a massage: Wat Pho. You can find a massage spot in a lot of touristy areas, like Khao San Road.
Getting a Massage in Thailand
18. Bangkok food tours
Bangkok is the foodie capital of Southeast Asia. So what better way to learn about Bangkok and Thai culture, than to take a Bangkok food tour. You’ll spend the afternoon food sampling in the foodie district of Bangrak, visiting local markets, learning about the Thai Michellin awards for food and 500 year old shop. There’s a few boutique tour companies where you can sign up for a food tour. I went through Taste of Thailand.
19. Street Food
Mouth-watering and inexpensive street food is what Bangkok is known for. It’s hard to imagine the Thai even want to cook at home. My favorite spots to experience good street food is: Saladeng BTS area, Chinatown, Bangrak, Khao San Road . Read Safety food tips for street food.
20. Yaowarat | Chinatown
Yaowarat is Bangkok’s Chinatown and it’s a foodie’s paradise if you love Chinese food. You can explore the streets day or night and you’ll find it bustling with fresh markets, wholesale products and busy workers. You’ll find some street sidewalks lined with food carts peddling delicious deep fried goodies. I had sticky rice and mango, a dessert that’s a national favorite.
Getting there: Take the Chao Phraya Ferry to Ratchawong Pier. Walk up Ratchawong Road to Sampeng Lane and Yaowarat Road.
21. Motorbike Taxis
For local Thai, motorbike taxis are an inexpensive and easy way to get to work or their apartment. Best for short distances and hard to reach places, rides cost according to neighborhood and distance. Some have standard rates, but the price menu is in Thai. Short distances within the same neighborhood will likely ballpark between 10- 60 baht.
Lugging a huge backpack? Not to worry. These guys can balance both, you and your luggage for the ride
22. Terminal 21
Terminal 21 is like you’re at an airport. The signs above the escalators transport you to different destinations. There’s nine floors of over 600 stores and a cineplex .
Getting there: Take the MRT (underground subway) to Sukhumvit or take the BTS Skytrain to Asok (direct access via Skywalk).
23. Central World
Central World is the largest mall in Thailand and quite possibly Asia. Stretching a few blocks long it’s got over 500 stores & high-end flagship brands. At night, walking down this street towards Pratanum district, you’ll find street hawkers selling clothes and street snacks.
24. Beauty Salons & Spas
Bangkok has a competitive range of skin and beauty salons and spas, which offer skin/body care treatment from facials to skin lightening and facial hair removal. Some even offer promotional discounts. Getting a haircut at a nice salon in Bangkok is like getting it in the U.S… albeit, it will cost me around 200 baht.
25. Siam Square
Siam Square is possibly the heart of Bangkok for any traveler. It’s my favorite stop. As a main transfer hub, it’s a shopping and entertainment area connecting to other shopping malls via sky bridge. At Siam Square, the air conditioning is always on high blast and there’s a wealth to do in that entire area. Check out:Siam Center/Siam Discovery Center Aquarium, Madame Tussaud’s Wax Museum, MBK Center, Siam Square One. I like going toSiam Paragon, one of the largest supermarkets in Bangkok. The supermarket is located on the basement floor tucked behind the food court. This ground floor is a definite must.
Things to Do in Bangkok: Siam Square
26. Siam Paragon & Cineplex
Siam Paragon is one of the main shopping malls in the Siam Square area. There’s a food court, Siam Discovery Center Aquarium and a cineplex. The Thai design theaters in a world-class way and thus, Siam Paragon Cineplex is a bucket list experience. They have IMAX, 4DX and luxury VIP options, where you can sit on anything from sofa seats to beanbags, while getting foot massage, alcohol or a buffet meal.
In Thailand, there’s an ongoing respect paid to the beloved King. Whenever you hear the Royal Anthem, you have to stand still. You’ll often experience this in the cinema before the start of every movie. But every now and then, you’ll hear it also being played in the metro. It’s surreal to see such a bustling area go quiet and still when it plays.
28. Hello Kitty Cafe
Nestled within Siam Square One, is Hello Kitty House Bangkok, quite possibly the largest Hello Kitty Cafe I’ve seen yet (It’s certainly larger than the one in Seoul at least). With three spacious floors of Sanrio, there’s plenty of photo ops and space to throw your next party. Visit the Hello Kitty Store downstairs, where you can sift through souvenir curios. Hours: 10 a.m. to 10 p.m.
Getting There: Siam Square One (ground level), Rama I Road, Siam BTS station.
Things to Do in Bangkok: Hello Kitty Cafe Bangkok
29. MBK shopping mall
If you’re shopping for cheap, check out MBK (aka Mahboonkrong) shopping mall. I like to browse their cheap mobile phones and chargers section, but there’s also jewelry and clothes, an arcade and theater.
Getting There: Take the BTS Skytrain to the National Stadium. You can’t miss it. Stretch out on the corner of the intersection, it sprawls blocks. It’s across Bangkok Art & Culture Center.
30. Medical Tourism
Thailand is known for medical tourism and houses some state of the art medical facilities for a fraction of the cost of what you’d normally pay elsewhere. Best of all, they make it quick and a visit to the doctor, you’re in and out.
Bangkok has many dentists and you’ll have many to choose from. Facilities can range from local to spa-like and prices are cheaper than the west. A popular and inexpensive cosmetic procedure travelers love is teeth whitening.
32. Seamstress and laundry services
Seamstresses and laundress are popular services for travelers, who have a load of laundry to do or some clothes for repair. They’re very good. Costs by weight in kilo, but usually tends to be under $2. Note: Launderers can perform tailor services or if not, recommend you to one!
33. Pantip Plaza
If you’re looking to geek out on computers, plug adapters and techie things, then Pantip Plaza is your spot. It’s an indoor IT and electronics shopping mall with five floors dedicated each to different types of electronics from computers to cellphone accessories, etc… It houses some computer and camera repair shops.
Getting there: On New Phetchaburi Road in Ratchathewi district. Take the BTS Skytrain and get off at Central World. You can take a motorbike taxi to Pantip Plaza or take a 15-20 minute walk to the end of Central World and around the corner to New Phetchaburi Road. It’s across the street and a stone’s throw from the Amari Watergate Hotel (read my review).
34. The Big C
The Big C is Thailand’s K-Mart or WalMart. It’s one of my favorite Thai department store and I can spend hours in there exploring grocery aisles, household supplies and beauty products.
Getting There: Take the BTS Skytrain to Central World. Walk towards the end of Central World and it’s across the street. Here’s a map.
35. BTS Skytrain
The BTS Skytrain makes getting around Downtown Bangkok a breeze and I love it. It’s clean, quick, air conditioned, and is a great way to escape the heat. It’s also raises you up high so you can appreciate Bangkok’s amazing cityscape view.
The Thai love to shop, boy do they love to shop, such that you’ll find food, clothes and market vendors set up on busy street sidewalks, metro stations and alleys at all hours of the day. Fave shopping streets:Khao San Road, Central World Mall, off BTS- Sala Deng & BTS- Siam. Victory Monument
37. Victory Monument
In for a good night market? Victory Monument by day, is a busy commercial hub for transportation, where you can catch local buses and minivans which go to many parts of Bangkok like Ayutthaya, Pattaya, Kanchanaburi, Koh Samed. But at night you’ll find it a hub of shopping for working class Thais who want something affordable and cute.
Getting There: Take the Skytrain BTS to Victory Monument
Victory Monument
38. Boat Noodles
If you love noodles, highly recommended is Boat Noodle Alley at Victory Monument. It’s tricky to find but worth the effort as you can choose the noodles you want and your broth. The noodle bowls are small and to die for, and they cost only 12 baht. As added incentive, if eat 12 bowls, you get a free bottle of Pepsi. My favorite: Best of the Boat Noodle restaurant
39. Khlong Saen Saeb commuter boat
During rush hour, the Khlong Saen Saeb commuter boat is a convenient mode of transportation for shopping, sightseeing. There are temples, markets, old simple wooden houses and interesting bridges, and it is possible to walk along the banks in many places. Note: the Khlong Saen Saeb route is limited and primarily services neighborhoods, but you can still use it to get around to some sights and it shows you a different side of Bangkok..
40. Thai Tea
Thai tea is a lightly spiced black tea flavor mixed with carnation milk for sweetness. It’s poured into a cup of ice. Note: No eating or drinking on the BTS & MRT, so often vendors, will bag your drinks up or tie a plastic carrying strap on it, so you can carry it onboard as takeout.
41. Deep Fried Insects
A popular fascination with western tourists are deep fried insects . They’re sold in carts wheeled around Bangkok’s streets at night. Deep fried insects are popular snacks in Thailand, especially with workers from the more rural regions of the country. Insects range from bamboo worms, wasps, grasshoppers, beetles and more. (Watch my video; the bug cart is featured at the end). Costs tend to be 10 baht per handful. Where you might find carts:Khaosan Road, Soi Cowboy, Khlong Toey Market. Read more here and here.
Downtown Bangkok has an abundance of ways to see Bangkok, which is why I always stay here. There are MRTsubway and BTS skytrain, allowing you to reserve taxis, tuk-tuks and bus for more harder to reach locations. The easiest way to Old Bangkok and Khao San Road is to use the Chao Phraya ferry to up to Old Bangkok. The ferry stops running at 7pm. Otherwise,you can take a taxi (read taxi scam tips here), tuk-tuk or bus to get around.
Those wanting to travel onward to other areas in Thailand and you want to book in advance, I recommend 12GoAsia (below). I’ve used them before and they’re great for advance booking and seeing timetables. Although it is always ideal to buy your tickets in person.
Thailand was my first “planned” solo trip. Safety, ease and convenience in getting around, eating, having a diversity of activities to do and sightsee, etc… Thailand is a perfect solo getaway. It is a highly recommended country for first time solo travelers and is one of my favorite countries.
Bangkok can be a fairly safe city for solo travelers, even at night. Downtown feels safer at night than Old Bangkok, as there’s more events and street shopping activities. However, there are always exceptions to the rule so one should always practice street smarts.
As a largely Buddhist culture, solo travelers need not worry about violent crime but look out for scams trying to trick you out of money. Be wary of taxi drivers trying to get you to pay more. Always ask for metered rides (or avoid taxis altogether!). Avoid ping pong sex shows scams (and sex industry areas) and ‘helpful locals’ who tell you your hotel or an attraction is closed.
Accommodations in Bangkok will delight you. From downtown boutique hostels with individual power outlets and card key security to 5 star designer hotels, Bangkok will spoil you. I haven’t blogged about all the places below, but I have stayed at them.
Lebua at State Tower. 5 star luxury hotel and home of the trendy Skybar. Spacious suites with jaw-dropping balcony views of Bangkok and the Chao Phraya River. Excellent breakfast buffet overlooking an infiniti pool. I spent one night here and I felt like I died and went to heaven. Nearest MRT: Saphan Taksin.
Amari Watergate Bangkok Hotel (Review). A luxury hotel in the shopping district of Pratanum, across from Central World. Thai hospitality in a corporate standard room overlooking the shopping streets of Bangkok. 8 minute walk from ChitLom Station, exit 1 for Central World.
Pullman G Hotel. 5 star boutique hotel for the designer in you. Chic, trendy, stylish rooms and lobby. A hotel any hipster will love with a gym and spa. Nearest MRT: Chong Nongsi.
Smile Society Bangkok Hostel. This hostel has a friendly heart, vegetarian cafe (limited hours) and clean, cozy dorms with a welcome lounge spot and free coffee. No elevator, so you’ll have to walk up steep stairs for your room. 5 minute walk from Saladaeng MRT
You can get most things in Bangkok and you’ll find a lot of your travel and toiletry needs at 7Eleven. The Thai 7-Eleven stores rock. Pharmacies are equally prolific. Medical and Dental Tourism in Thailand is modern, world class and inexpensive. A couple things to bring: Deet based mosquito repellent (Thailand only has regular repellent) and women should bring tampons. Tampons are available in Thailand but not common or easy to find.
American travelers often pay a premium on travel insurance. World Nomads offers economic solutions for travelers who seek security and peace of mind. It covers 150 countries. Read reasons you NEED travel insurance.
Watch Thailand Travel Guide videos for Solo Travelers
«
Prev
1
/
13
Next
»
10 THINGS TO DO IN PHUKET | Phuket Travel Guide
HOW TO USE BIDET SPRAYER TOILETS ( aka BUM GUNS IN THAILAND !!)
“The journey of a thousand miles begins with one step” – Lao Tzu
New Year, New Me ? Not exactly.
In 2010, I started my gap year with a Korea-bound work contract and hoped the change might spark new realizations of my future. While I love expat life and find joy in teaching English in Korea, the same old career dreams and callings prevail as well as, the yearning for extended travel. With 2011 on the rise, I get to wondering:
What if my old and new self aren’t so different?
While my expat life may be coming to an end and I may not have a clear vision of what my future yields, there’s one only one certainty to arriving at where I
The village is a small Chinese cultural site tucked away on the country outskirts of Pai. It is easily reached 45 minutes by motorbike on your way to the Morpeng Waterfalls. I was recommended to this place from another traveller, Graham on the bus from Chiang Mai and wasn’t sure to expect.
Pai Chinese Village (aka Santichon Village) is a commercial park
Santichon Village (more favorably referred by locals as Pai Chinese village) was once a settlement for Chinese who escaped the Mao regime. It’s said that the local culture was once a mixture of Yunnan Chinese and Thai.
When I reached The Chinese Village (aka Suntichon Village), I parked my bike in a parking lot crowded with tourist buses. I hurriedly walked through the village grounds. I was distracted by my fuel tank warning and the fact in under an hour, the roads would be black (I was still learning how to ride my motorbike). But a quick or well-paced stroll of the grounds, would not change my sentiments about this place. You can easily take it all in in under 20 minutes. The village is not an authentic traditional village, but a replicant commercial park or cultural center.
Santichon Village shopsSantichon Village
The main center of the village holds a nicely manicured park, surrounded by mud hut bungalows, an outdoor deck restaurant and newish-looking souvenir stores selling Chinese items, herbs, pickled seeds and serves tea. You can sip Chinese tea while looking out over the lawn.
A man-operated ferris wheel, sits in the middle of the main lawn. Apparently, you can book homestays in the mud huts.
I’ve seen photos where there’s an area which replicates the Great Wall of China and houses some Chinese looking buildings around it. But it could be tucked away from the main grounds and shops.
One tip: Avoid visiting midday as aside from the shops, there is very little shade in the area.
pai chinese village suntichonSuntichonMan made ferris wheel
Conclusion
I’m not sure if I’m convinced that Santichon Village does a very good job in teaching or introducing Yunnan culture to you through this spot. Locals live around the village but they seem to live very Thai. Pai Chinese Village might be worth a stop if you’re looking for something to fill your itinerary, but if time is a concern, you’re best off flying past Pai Chinese Village and choosing other several other worthwhile Pai attractions.
What do you think of Suntichon Village? Is Pai’s Chinese Village your next stop?
Essentials for Thailand
Recommended Essentials for Thailand. Click to Shop.